Flow
Flow
Flow
TriniTuner.com  |  Latest Event:  

Forums

Project S14.5 Spec R, Part II VE-T In the Making Page 26!!!

Automotive Non-Technical topics... Just anything car related for the gear head in all of us

Moderator: 3ne2nr Mods

User avatar
Picasso
3ne2nr Toppa Toppa
Posts: 5013
Joined: April 28th, 2005, 8:24 am
Location: In a Big Body old car

Postby Picasso » January 13th, 2010, 7:30 am

I eh see no Driftworks stickers to certify it all :poke: :lol:

User avatar
TriniGT
punchin NOS
Posts: 4293
Joined: May 6th, 2003, 12:22 pm
Location: Home Playing DIYer

Postby TriniGT » January 13th, 2010, 8:58 am

Picasso wrote:I eh see no Driftworks stickers to certify it all :poke: :lol:

Hey doh clutter meh ched!!! I want a clean car, hardly any stickers, may put one or two simple ones in the quarter glasses and that's it. Was thinking of putting a Driftworks or an Origin front screen sticker but nah keeping it clean. Bodykit is an Origin kit and the suspension is a combination of SPL and Driftworks, more so Driftworks. Engine building tonight so I ain't answering no calls. Gonna build the block and attach the gearbox and drop it in to check fitment, once I have tunnel clearnace it will stay there and once the head has been fully worked I will drop it on. Will drop on the nismo CF bonnet same time.

At the same time I wanna thank people that have helped thus far, Dry of course for the help and fine parts and the bonnet for mock up, Cowboys for more parts ( alot of rear end parts at a very high price though), some friends over in the States for some of my interior parts, Navin @ D&D for the front half, the fella in south (can't remember his name other fine interior parts and door rubbers and door interiors), another guy form the US for the new S15 Quarter Glasses (I was acutally going to use Plexi glass instead but he came through for me) and Riyad for the late night runs all around to collect parts. I have been hunting for the past couple of years collecting parts off of deals here, UK, US, Australia amongst many other places.

Lastly I would like to thanks all the sponsors ............................... hmmm that would be me and the wifee yes :lol:. She has put up with so much along with my family with all the junk I collected over the years and filled the house with making it an uncomfortable situation. Most of the rubble is in the car now and they are finally seeing the progress. After it is done all the leftovers are for sale and or dumped.

User avatar
wraith
Trinituner Peong
Posts: 424
Joined: February 10th, 2005, 3:54 pm
Location: Grenada
Contact:

Postby wraith » January 13th, 2010, 9:28 am

car looks great and to think it will look even better once all the parts are installed.

The body looks great where they joined the 15 to the 14, if somone did not know they could hardly tell.

Well done.

User avatar
TriniGT
punchin NOS
Posts: 4293
Joined: May 6th, 2003, 12:22 pm
Location: Home Playing DIYer

Postby TriniGT » January 13th, 2010, 9:39 am

The only thing that I have not fixed properly is the center console, the floor plan has a slight difference between the S14 and the S15 so that the S15 center console and armrest does not seat properly and also does not currently bolt down to the rear of it. I will have to make a bracket to bolt to the flooring and then bolt to the armrest. There is a slight space as well but you wouldn't know if I didn't tell you so. Most parts that were welded on were further reinforced with metal plates, like where the front and rear were attached even though the factory spot welds were use to attach the front. The engine bay and flooring were also stitched for rigidity. I have only one issue with how the guy attached the front, he did not bolt on the tension rod brackets when attaching the lower rad support so now when I tried to bolt on the brackets they are a little off. I had to elongate the bolt holes but now it is not a problem.

User avatar
Maserati
Trying to catch PATCH AND VEGA
Posts: 6867
Joined: May 26th, 2003, 12:35 am
Location: up d road
Contact:

Postby Maserati » January 13th, 2010, 1:10 pm

nicely done so far, can't wait to see the finished product

User avatar
AYE_SOLDIER
Shifting into 6th
Posts: 2027
Joined: April 5th, 2007, 2:41 pm
Location: "you cant fake fresh!"

Postby AYE_SOLDIER » January 13th, 2010, 1:52 pm

Maserati wrote:nicely done so far, can't wait to see the finished product


x2!

User avatar
Bezman
Trying to catch PATCH AND VEGA
Posts: 6635
Joined: April 24th, 2003, 2:47 pm

Postby Bezman » January 13th, 2010, 2:47 pm

why not do away with that entire harness and get a DIY 21 fuse harness and rewire the car, that way you can strip the engine bay etc

I am sure you are running a standalone too? this would also make life easier

looks awesome..

User avatar
TriniGT
punchin NOS
Posts: 4293
Joined: May 6th, 2003, 12:22 pm
Location: Home Playing DIYer

Postby TriniGT » January 13th, 2010, 2:53 pm

Was contemplating doing that but I am running the ABS and some other standard parts and the instrument panel setup as well hence keeping the stock wiring as it would have been a bigger nightmare starting from scratch. I got enough grays as it is. Gonna be running a Power FC for now and then later on a Vipec.

User avatar
belalegosi
18 pounds of Boost
Posts: 2401
Joined: August 19th, 2003, 8:53 pm
Location: MN
Contact:

Postby belalegosi » January 13th, 2010, 3:54 pm

dang sweet project.

glad to see others actually building there own cars and getting there hands dirty instead of just throwing $$$ at it.

btw u intend to do a wiretuck? It wouldnt be jay dee emmm if you didnt :mrgreen:

User avatar
reecewashi
Ricer
Posts: 16
Joined: January 22nd, 2008, 11:07 am
Location: Tobago
Contact:

Postby reecewashi » January 13th, 2010, 4:39 pm

sweeeeeeeeeeeet project man

User avatar
Zorak
Sweet on this forum
Posts: 297
Joined: September 7th, 2007, 10:28 am
Location: Location, Location!

Postby Zorak » January 13th, 2010, 6:18 pm

this is amazing man! i wouldn't even know where to begin!

User avatar
TriniGT
punchin NOS
Posts: 4293
Joined: May 6th, 2003, 12:22 pm
Location: Home Playing DIYer

Postby TriniGT » January 13th, 2010, 8:46 pm

Wiretuck is a nice idea, was contemplating it, will see what can happen. Thanks for the positive comments, thought men were gonna come on here sayign but is still not an S15 and whatnot. I got the RB block on the stand today and began the cleaning process. Got all new welsch plugs aka water and oil jackets and removed the old ones to help with the cleaning process. Got out the metal brush and began wiring it and using some purple blaster, gonna go back at it later again and after will spray some WD40 in the oil galleries for now until the build starts hopefully tomorrow. Block was not as heavy as last time, I feel is all the iron I pulling these days the RB block was not too bad to put on the stand by myself. Some pics hopefully tonight or tomorrow. Back to cleaning.

User avatar
$m@llboy
Ricer
Posts: 26
Joined: May 26th, 2008, 11:22 am
Location: Cruising on the wangan in my "DEVIL S15"!!!!!
Contact:

Postby $m@llboy » January 13th, 2010, 10:07 pm

Wow! :shock: Following this post for a while now. Looks great TriniGT!!!!! :twisted:

User avatar
R. Mutt
Shifting into 6th
Posts: 2106
Joined: August 24th, 2004, 9:58 am
Location: on the side of the road maptracing and reflashing the ecu
Contact:

Postby R. Mutt » January 14th, 2010, 6:35 am

Very nice Jason, keep us posted. More pics too!

User avatar
TriniGT
punchin NOS
Posts: 4293
Joined: May 6th, 2003, 12:22 pm
Location: Home Playing DIYer

Postby TriniGT » January 14th, 2010, 7:55 am

Cleaned the RB block last night, damn after the skimming of the block for straightness it sure left a lot of gunk everywhere throughout the block. I removed all the water and oil jackets aka welsch plugs and soaked the entire block with purple blaster and left it for half an hour to really get into the grease and old oil. Came back with the pressure washer and round one began. Lots of swarf that was stuck up all over came off. After washing I further inspected and found some more stuck on the inside of the block so I soaked again and washed again. The entire inner walls are now clean. I blasted the oil and water galleries but I want to go over everything again today just before engine assembly with some soapy warm water. That way it can penetrate and then once washed with warm water as well will disappear and not collect anywhere. After that I will need to spray the oil galleries with some WD40 and then blast them with the compressor to clean properly.

I will fit the Tomei oil restrictor and also begin cleaning the stock 'baffling plates' that attach to the girdle as they are oily and didn't want to clean them as they would have surely rusted. I am going to also clean up the water galleries on the block to allow a better flow around the cylinder walls. I have already widened the stock oil drain holes in the sump as specified by Tomei for the installation of the Tomei Baffling kit so Sump will be cleaned thoroughly with a wirebrush and some purple blaster and then blasted as well. I forgot to add the aluminum fitting for the oil drain back on the sump so I will get it attached today before final assembly starts. Bought the Redline Assembly Lube from tuner Imports for assembly so everything looks like a go.

First assembly will be the block, CP 86mm pistons, Stock GTR Rods with ARP connecting rod bolts, Cosworth Rod and Main Bearings and ARP Main Studs and also Tomei Oil Pump and all new seals and gaskets. Cranks has alreayd been checked and is A ok so assembly on the block should be fine. Was thinking as soon as the block has been washed in the warm water I will prime it and paint it same time in black lacquer paint and reattach the new water and oil jackets. The warmth of the block will help the paint hold much easier. I will get pics of the block today, I was quite please with the outcome this morning. Cylinders were oiled so that they would not get rust or oxidize while left unattended, so too were bearing grooves. On finall assembly the groove will need no oiling but a thorough cleaning and some thinners to dry the area for a proper seat with the bearing. also have all my torquing specs for all studd new and old waiting, some a five step torquing process and other three and other two. That's it for now :twisted: .

User avatar
Sanctifier
punchin NOS
Posts: 3768
Joined: June 9th, 2004, 8:09 am
Location: Good question!

Postby Sanctifier » January 14th, 2010, 1:18 pm

This looks like a Happy New Year all year long for you, Trini.

Congrats on a great build. Hardest part is getting the minor details right.
Looking forward to seeing it in the flesh soon.

User avatar
TriniGT
punchin NOS
Posts: 4293
Joined: May 6th, 2003, 12:22 pm
Location: Home Playing DIYer

Postby TriniGT » January 14th, 2010, 1:23 pm

Yeah you were definitely an inspiration, how could I forget you. Got most of the minor things sorted just one of two things now, engine and wiring being the main thing. Gonna make it a DIY as well :wink: .

Tunerholic
Riding on 13's
Posts: 8
Joined: February 9th, 2009, 5:42 pm

Postby Tunerholic » January 15th, 2010, 7:03 pm

i just went through the thread, very nice build, a lot of work but the end result looks promising. One question though, why are u using the GTR stock connecting rods as oppose to any good aftermarket upgrades?

User avatar
TriniGT
punchin NOS
Posts: 4293
Joined: May 6th, 2003, 12:22 pm
Location: Home Playing DIYer

Postby TriniGT » January 15th, 2010, 10:34 pm

GTR rods with ARP bolts can handle 600HP comfortable. GTR rods have never been a problem it the bolts that stretch and cause failure.

User avatar
Picasso
3ne2nr Toppa Toppa
Posts: 5013
Joined: April 28th, 2005, 8:24 am
Location: In a Big Body old car

Postby Picasso » January 16th, 2010, 11:21 am

Boi try and talk Navin into going back with the RB26 nah :lol: :lol: :lol: ...probably if he see you making around the same hp as him and it is reliable then he might go for it.. :wink:

User avatar
turbonator
Chronic TriniTuner
Posts: 577
Joined: January 10th, 2006, 10:45 am
Location: Mount Akagi
Contact:

Postby turbonator » January 16th, 2010, 4:58 pm

Bump for a best build :o . I must say you are very determined to stick with this project for so long. Would love to see this when its finished. Best of luck with the rest of the build :)

Slideways
Ricer
Posts: 15
Joined: March 15th, 2009, 8:33 am

Postby Slideways » January 17th, 2010, 11:16 am

please give us some more pics i am really fascinated to see a car built as ones listed on magazines
very thorough build, nothing left unscaled

one plus to this build is that every time you change your mind there are some quality parts for sale :wink:

User avatar
TriniGT
punchin NOS
Posts: 4293
Joined: May 6th, 2003, 12:22 pm
Location: Home Playing DIYer

Postby TriniGT » January 24th, 2010, 2:47 pm

Well finally took some of the parts from of the shelves in my room,
CP 86mm Pistons
Image
In pics below,
Cosworth Bronze Valve Guides, Greddy Cam Gears, Greddy Timing Belt, Tomei Oil Pump, Tomei Fuel Rail, Cosworth 1.5mm Headgasket, ARP Headstuds, ARP Main studs, ARP Connecting Rod Bolts, Cosworth Main and Rod Bearings and water and oil jackets. Things missing are Tomei Metal Gaskets, OEM Nissan Gasket Kit, OEM Nissan Tensioner and Idler Pulleys with new studs and nuts.
Image
Image
Image
Image
Some Bling,
Image
Tomei Baffle Kit fitted to RB Sump,
Image
Image
Tomei Oil Restrictor,
Image
Transfer Case removed and axle entrance welded shut,
Image
The Victim, still needs a final soak with some soapy warm water before final paint and welsch plugs/fluid jackets are added,
Image
Engine was soaked with purple blaster and left for half an hour and then blasted with a pressure washer
Image
Image
Image

User avatar
Picasso
3ne2nr Toppa Toppa
Posts: 5013
Joined: April 28th, 2005, 8:24 am
Location: In a Big Body old car

Postby Picasso » January 24th, 2010, 3:01 pm

^^ Ah boi so yuh room finaly getting more space :lol: :lol: Let me know when you going to work on the engine and I will come up and help out :mrgreen:

User avatar
Rooki3
TriniTuner 24-7
Posts: 7219
Joined: December 18th, 2008, 10:52 pm

Postby Rooki3 » January 24th, 2010, 4:45 pm

TriniGT, :shock: :shock: :shock:

User avatar
HaRdCoRe_YoUtH
Chronic TriniTuner
Posts: 518
Joined: November 11th, 2007, 10:33 pm
Location: when in doubt throttle out!! Side-B

Postby HaRdCoRe_YoUtH » January 25th, 2010, 2:41 am

TriniGT, keep up the good work bro!! one day i will step up my game and move up from the 4age to a RB26!!

User avatar
TriniGT
punchin NOS
Posts: 4293
Joined: May 6th, 2003, 12:22 pm
Location: Home Playing DIYer

Postby TriniGT » January 25th, 2010, 9:57 am

Boy it took years for me to save to buy the parts and do the conversion on the car as well. Many a time I got sick of seeing the car doing nothing and also many a time I made changes on what engine to use. Hopefully everything works out in the end.

User avatar
Sanctifier
punchin NOS
Posts: 3768
Joined: June 9th, 2004, 8:09 am
Location: Good question!

Postby Sanctifier » January 25th, 2010, 10:52 am

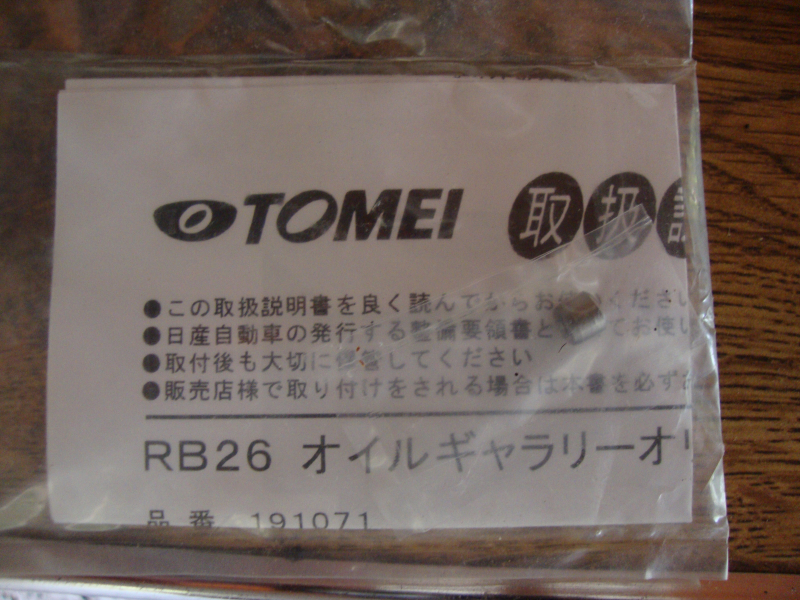
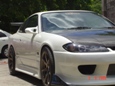
TriniGT wrote:Boy it took years for me to save to buy the parts and do the conversion on the car as well. Many a time I got sick of seeing the car doing nothing and also many a time I made changes on what engine to use. Hopefully everything works out in the end.

Yup... you are not alone :!: Been there...Doing that :!: With TWO project cars :!: ... :roll:

Late 2010, at least for my daily driver :?: ... God willing.

User avatar
TriniGT
punchin NOS
Posts: 4293
Joined: May 6th, 2003, 12:22 pm
Location: Home Playing DIYer

Postby TriniGT » January 25th, 2010, 11:12 am

Ent, is yours in the completion stages or is it done?

User avatar
TriniGT
punchin NOS
Posts: 4293
Joined: May 6th, 2003, 12:22 pm
Location: Home Playing DIYer

Postby TriniGT » January 25th, 2010, 11:15 am

Ahhh sweet, keep at it, you made me keep at mine :wink: .

Advertisement

Return to “The Car Park”

Who is online

Users browsing this forum: No registered users and 43 guests