Next month makes one year since I've taken ownership of this vehicle, so it's been too long for me to upgrade my audio. I still believe that for a stock system, it wasn't too bad.
So let's just get into it.
I'm including some pics of scrapping the door since I haven't seen many of these online.
#1 - Door Panel Removal
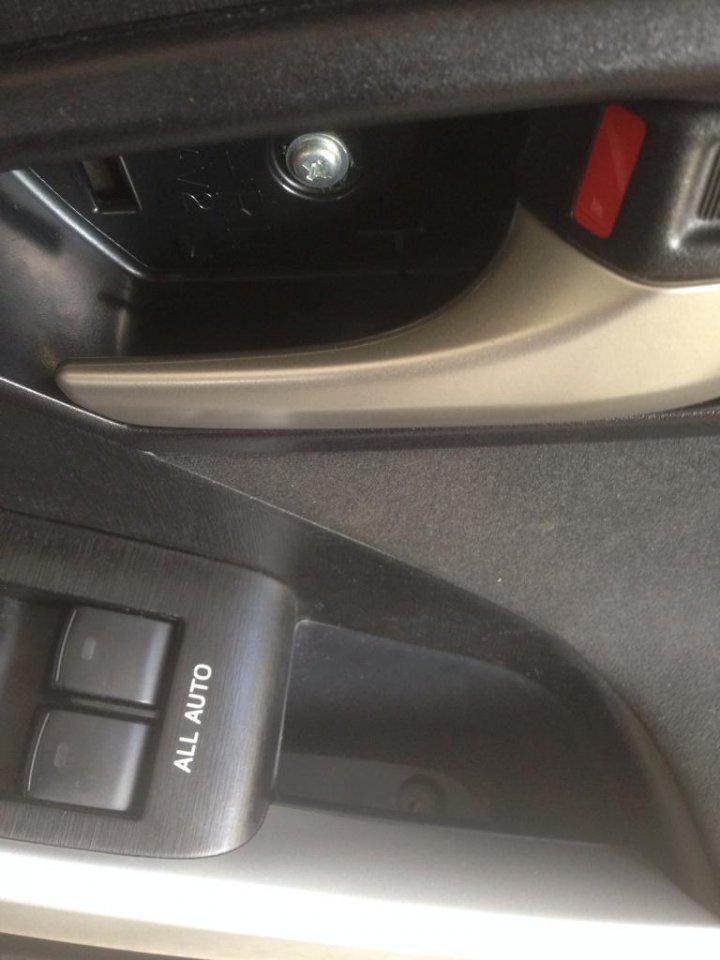
In this picture, there are two screws that need to be removed. I'd suggest a pry tool to remove the plastic piece behind the door handle. The second screw (already removed in this pic) is in that little pocket behind the window switches.
#2 - Door Panel Removal
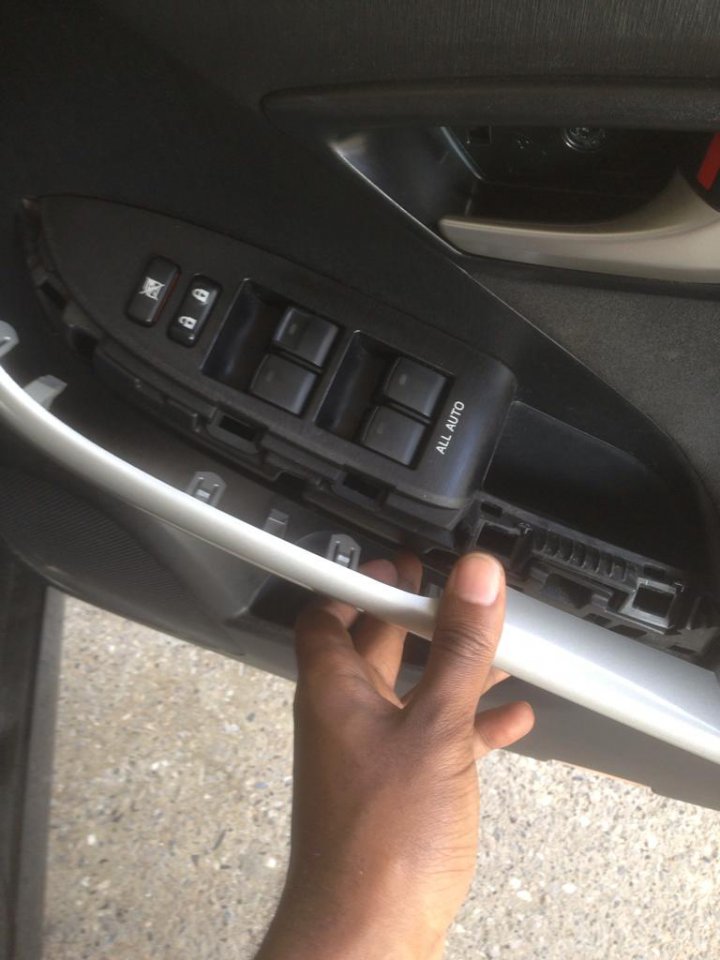
Pull the silver piece upwards. This can be done with your hands, no tools needed. It always feels like it's going to break, but it's fine. After you pull that piece up, the windows switches need to be pulled up as well then the plug behind it, disconnected.
#3 - Door Panel Removal
Be VERY careful here! Begin pulling the door card. It'll just pop out. Best grip I got is to the side of the speaker. When it pops out, lean toward you and look in. You need to disconnect three things. To the bottom of the pic (which is my view looking down, so it's actually the top of the door) you see a white and a green plastic going into you door handle. Lift them out of place and turn the wire till the ball simply lifts out. Failure to do this carefully is how I broke it on my Fielder.
Secondly, the door has a light to the bottom. Reach in and disconnect the power to it. Failure to do this is how I almost broke the passenger side before taking pics of this one.
#4 - Door Panel Removed
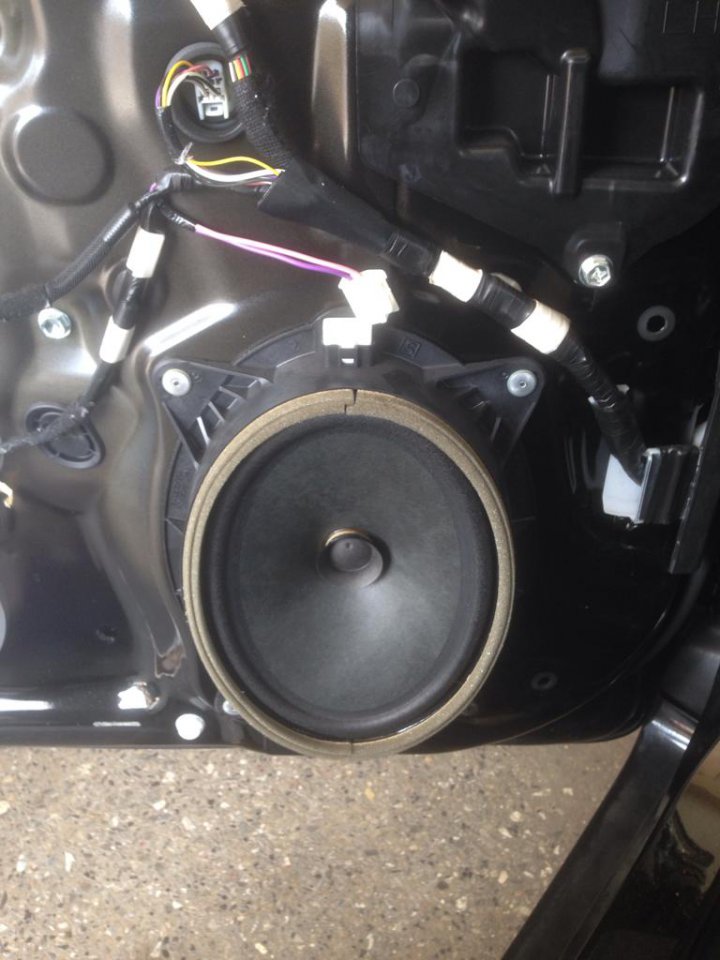
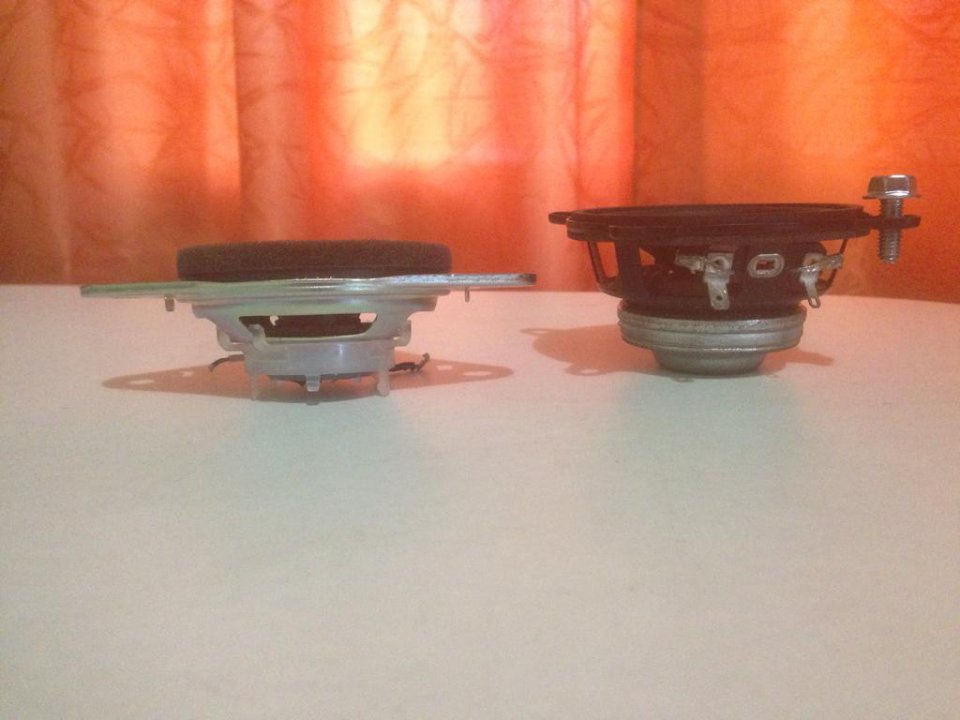
Here's the stock 6 x 9. I took a video of it playing and couldn't really capture how it struggles at times.
6 x 9 Toyota risers aren't readily available here so I went with the idea of a user on another forum
to simply cut it out and re-use the same bracket. This was the most difficult part for me to do... not because it was hard physically... but I had to take a knife to a speaker. I'm sorry to add to the murder toll

#5 - Speaker cut out
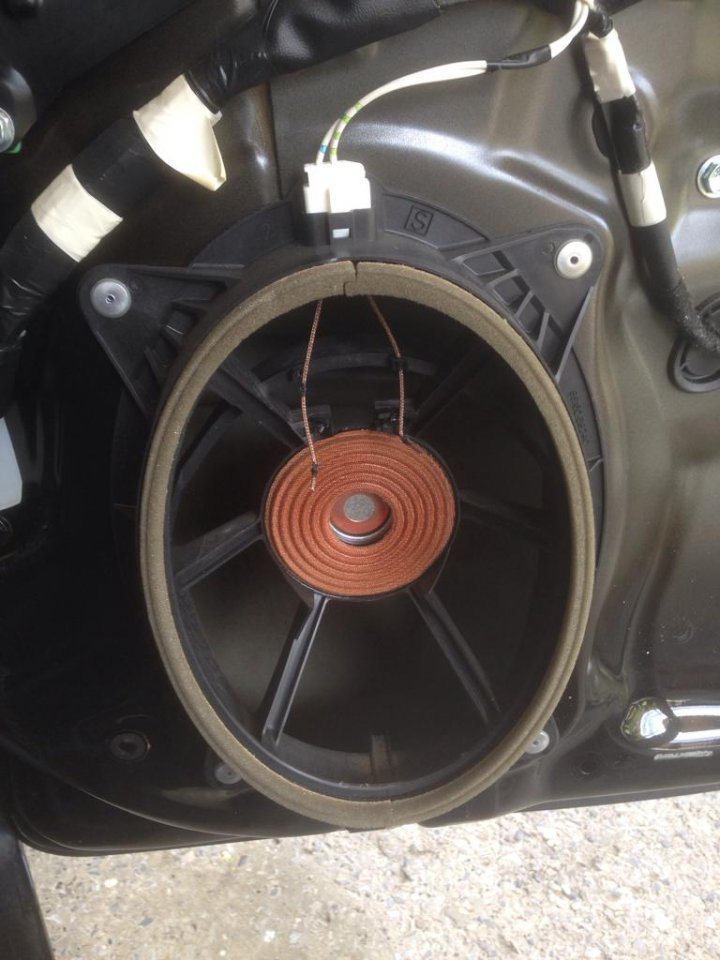
If you're going to do this, to make it easier for you, you just need to start the cut then pull on the surrounds. The material is pretty strong so it will unstick before it rips. After that, I just used a hacksaw to cut out the bracket. I forgot to take a pic of the new 6x9's installed, but it's a pair of Pioneer TS-A6986. These speakers are special to me because it's the first pair of speakers I ever purchased... 13 years ago. It's the first time they're ever being properly amplified.
#6 - Stock Speaker connection
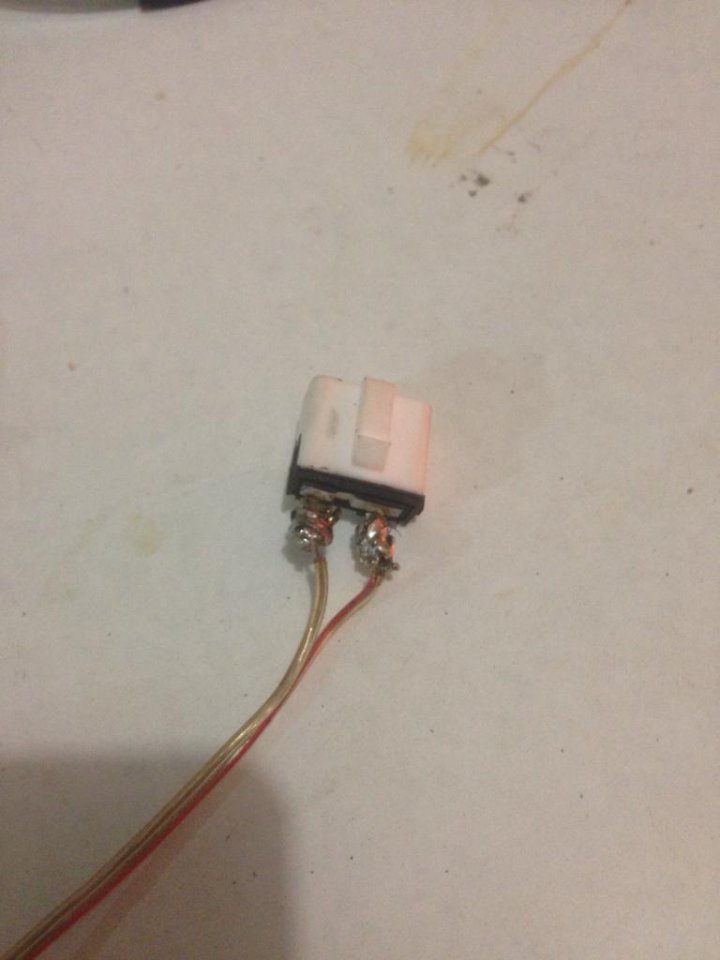
I'm so glad I didn't have to cut the stock speaker wiring. The plug actually comes out. I just re-soldered the new wires to run to the speaker. Yes, I know my soldering skills aren't full 100.
After both plugs were done and speakers installed, I tested them on the Head unit to ensure everything was working before proceeding.
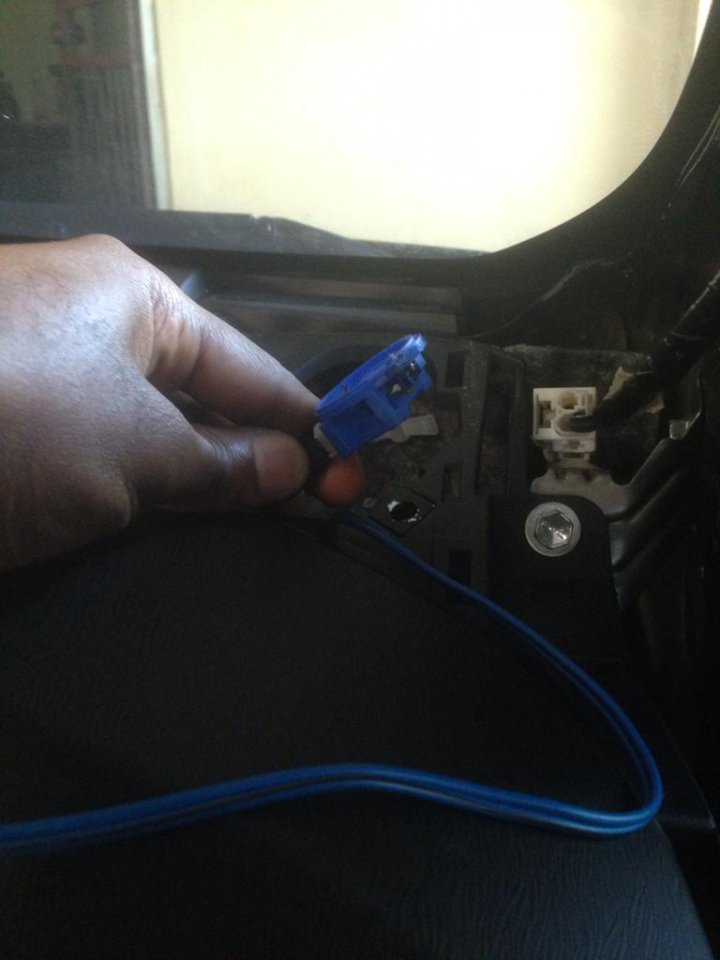
#7 - Power Cable Run
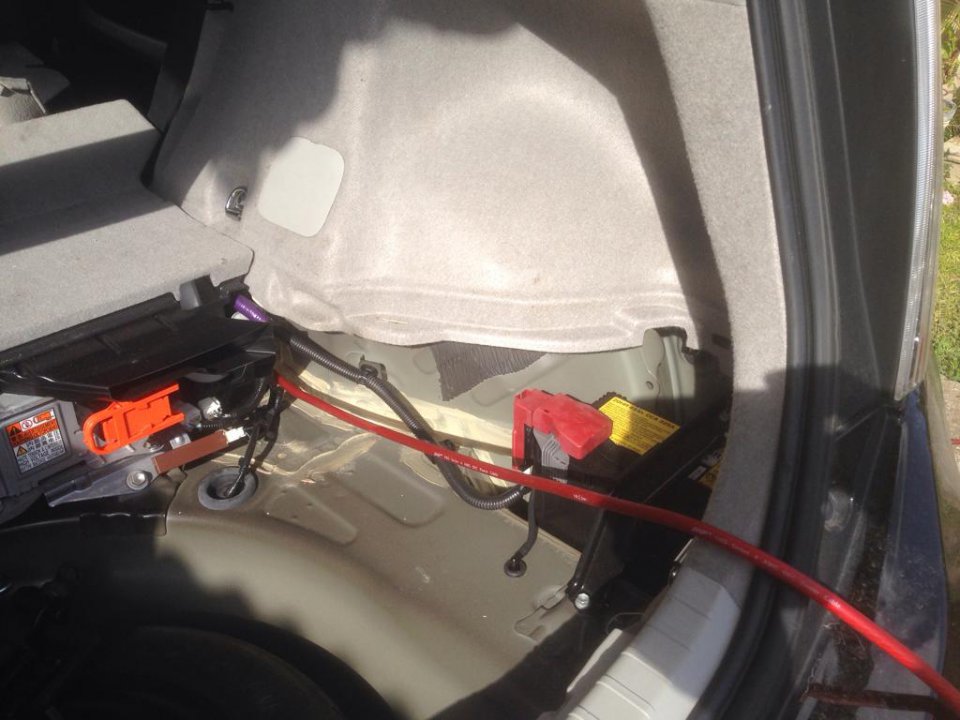
This is by FAR the easiest power cable run I've ever had to do since the battery is in the rear of the car.
#8 - More Power Cable
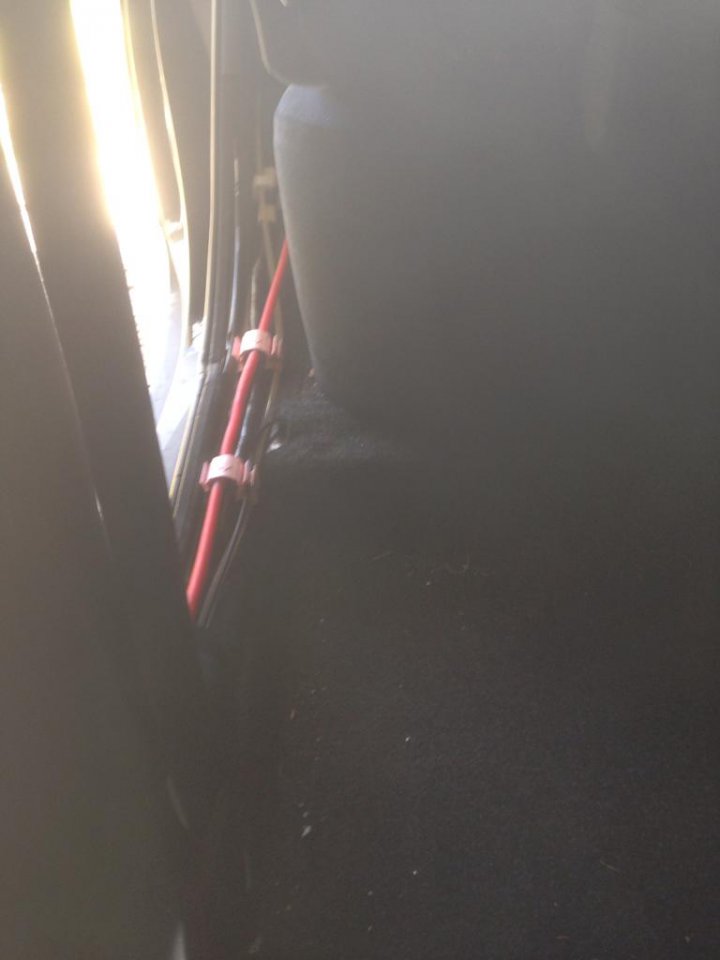
It's like they knew I wanted to run 4 AWG cable
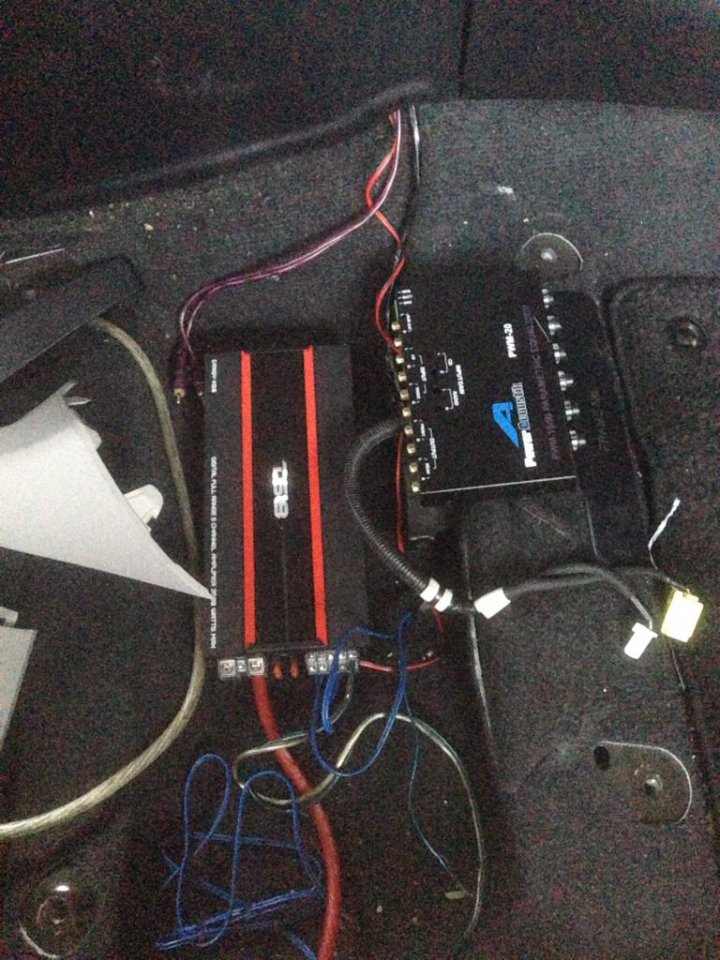
#9 - Power plant
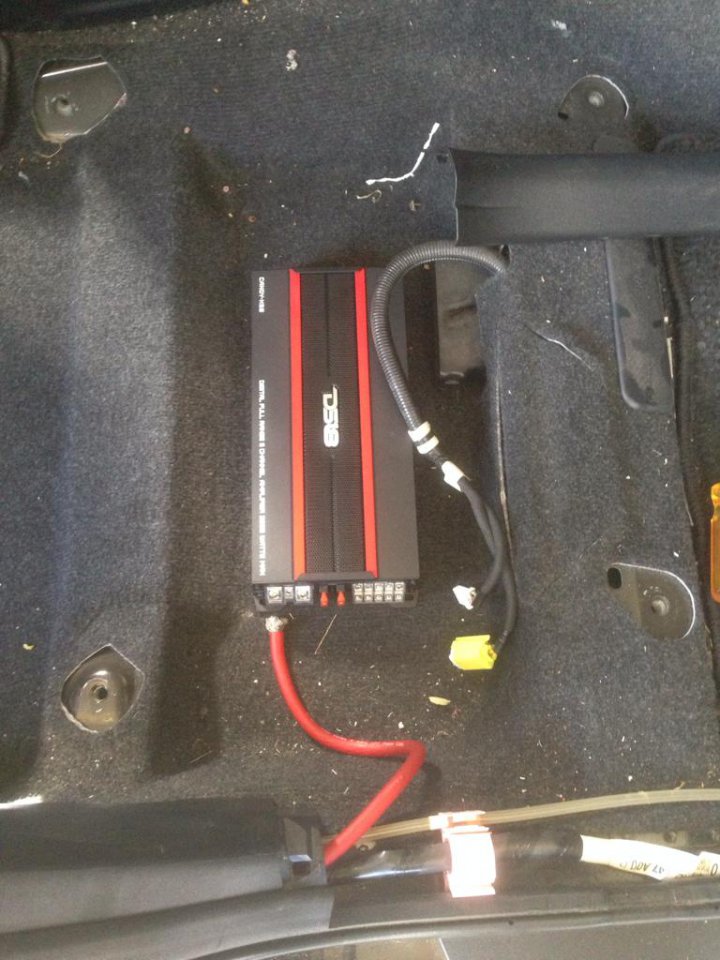
YES the floor's super dirty.
This is below the driver's seat. ENSURE TO DISCONNECT THE BATTERY BEFORE THIS STEP.
I didn't take pics when removing, but those two plugs are from the seat it self. White is for the seatbelt, yellow for the seat airbag. Just my advice because it took me ages to figure it out...
With the yellow plug, when you press on the inner white tab, the outer yellow part comes up first, then press that same white tab again to release the whole plug. Damn near broke the thing out trying to figure this out.
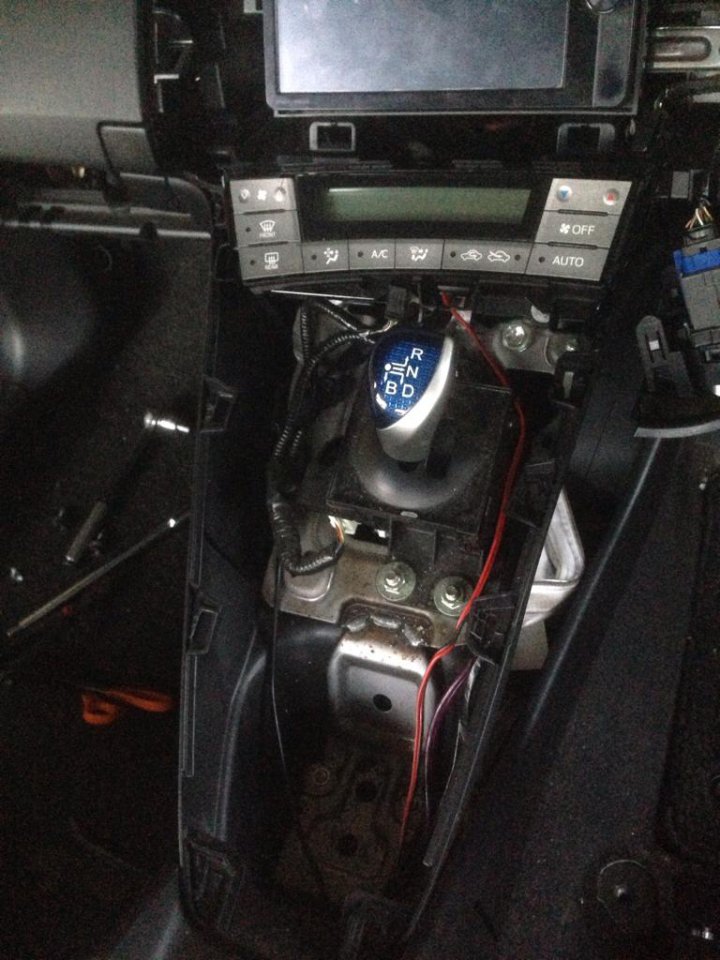
#10 - Harness
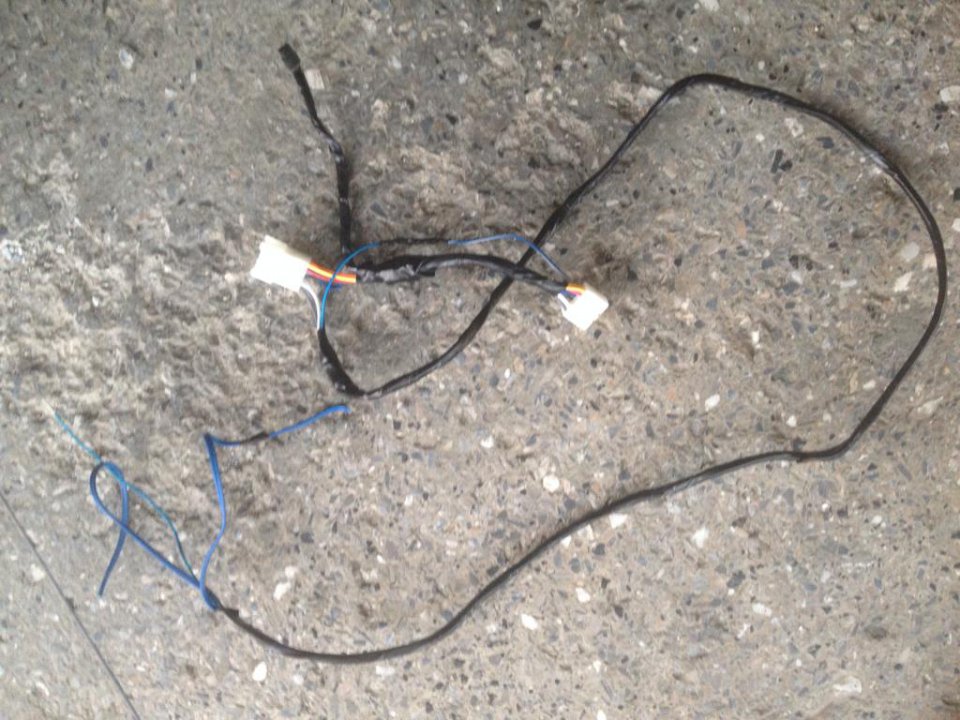
I'm using the stock Head Unit for now so I bought the harnesses to avoid any cutting. This is, by a huge margin, the neatest wiring I've ever done. The darker blue wires below will receive power from the amp and send it back through the stock plug, while the light blue wire is the remote turn on. What looks like a single black wire above is actually taking the original feed from the head unit to send to an RCA converter which will then be run to the amp.
#11 - Tweeter removal and replacement
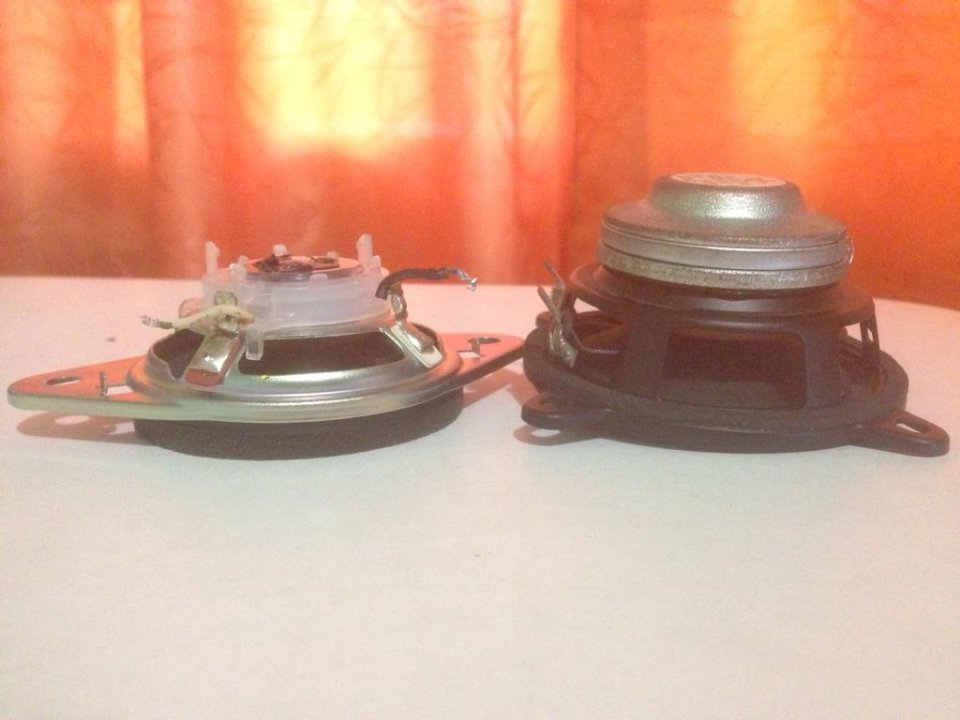
So here's the old vs the new. What's not pictured here is the stock plug that I removed from the old tweeter. I needed that later.
The speaker replacing the tweeter is a Faital Pro 3FE200.
#12 - Factory Plug speaker jump
So here's the original connection to the tweeter. The factory wiring runs to the tweeter, has a capacitor to block unwanted frequencies then send the full range to the factory woofer. I ran those blue cables you see there then simply plugged the tweeterless connection right back in to allow the original door speaker wires to be used.
#13 - Wire Runs
Ran speaker and RCA wires through the center console. Was pretty surprised when I saw how dirty in there was.
#14 - Final placement
This is the last picture I took before completing. As simple as everything looks here, thanks to lack of proper tools in some cases, new discovery in others... this took me two days to do.
Patience was running low coming down to the end so please forgive me for the lack of pictures.
There's three things left to do:
1) For some reason I'm not getting signal from one of the leads from the head unit. Ruled out the RCA, amp and pre-amp so it's either the converter, bad solder, or the adapter itself. Right now the front is playing a mono signal.
2) Subwoofer to go in a custom fiberglass enclosure.
3) Get some proper wiring looms to enclose the speaker wires.
Will update when I'm actually completed.