Flow
Flow
Flow
TriniTuner.com  |  Latest Event:  

Forums

Build Project: Suzie!!

Diesel, Gas, 4x4, 4x2

Moderator: 3ne2nr Mods
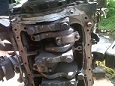
Forum rules
This forum is for discussions on Trucks and Pickups only!
DO NOT POST ADS IN HERE
WTB (Want to buy), LF (Looking for), EOI (Expression of Interest) or FS (For sale) topics etc will be deleted.
If you are looking for a part please search or post in the Auto Parts Classifieds.
Please keep all discussion professional and technical. Opinions are welcomed, however trolling, spamming and bashing will not be tolerated.
User avatar
black start
TriniTuner 24-7
Posts: 7974
Joined: February 25th, 2010, 10:42 am
Location: conquering the pothole solodex

Re: Build Project: Suzie!!

Postby black start » October 20th, 2012, 10:33 am

PARTS2go wrote:
neckto wrote:i forgot to mention in my update:AC guy passed in today. looked at the condenser and advised against using it and the drier (he's looking for the easy way out imho) but i will buy the new parts cause i know how faulty AC parts doe give real headache and cost more in the long run

so im looking for a new 14 X 24 universal condensor

drier (filter) bottle

and expansion valve for the evaporator............anybody, please feel to quote me, i already got prices from parts to go


Parts2go is bess price for new a/c parts bro.


lol....you bigging up yuhself? :lol:


anyways you all really have good prices, so do your thing

User avatar
PARTS2go
3NE 2NR for life
Posts: 197
Joined: September 13th, 2011, 11:14 am

Re: Build Project: Suzie!!

Postby PARTS2go » October 20th, 2012, 3:40 pm

You need a multi flow condenser. The people who sold you the condenser probably really happy you bought it & got it off their hands.

The single flow we have for $200, you spent $85 too much but those work with the R12 unavailable gas. R134a new gas operates with much higher pressures that's why the industry now uses much more efficient multi flow systems to handle the higher heat load.

We are the #1 auto a/c parts Caribbean distributors, we wholesale many a/c parts retailer shops & tech shops throughout the Caribbean.

The condenser is the radiator for the a/c. You may have saved $300 on the condenser but it will cost you repetitive compressor failures & changes due to the inefficiency of your condenser to handle the heat load. It's like installing a small radiator...you will have engine overheating problems eventually costing you an engine change or expensive repair.

Do not use 415b refrigerant. It is highly flammable & not compatible with the materials.

Find a good a/c shop to put things together for you. A shop that uses pure R134a & not a tank just labelled R134a or 415b. You need PAG DEC oil not ester oil. Many professional a/c shops have refrigerant identifiers & could prove the purity of the refrigerant they are using.

Cut corners with a/c & you will watch your money flowing down the drain. We are not just trying to sell our parts to you, we supply you with the correct parts & support for you to fix it right the first time & save you money.

Ask me for any advice you need, I will help you although you not supporting our business, it kinda hard to see a brother spending money & don't know what he doing or getting himself into.

User avatar
neckto
I LUV THIS PLACE
Posts: 919
Joined: July 7th, 2003, 10:03 am
Location: DIY - ing
Contact:

Re: Build Project: Suzie!!

Postby neckto » October 20th, 2012, 7:10 pm

PARTS2go wrote:You need a multi flow condenser. The people who sold you the condenser probably really happy you bought it & got it off their hands.

The single flow we have for $200, you spent $85 too much but those work with the R12 unavailable gas. R134a new gas operates with much higher pressures that's why the industry now uses much more efficient multi flow systems to handle the higher heat load.

We are the #1 auto a/c parts Caribbean distributors, we wholesale many a/c parts retailer shops & tech shops throughout the Caribbean.

The condenser is the radiator for the a/c. You may have saved $300 on the condenser but it will cost you repetitive compressor failures & changes due to the inefficiency of your condenser to handle the heat load. It's like installing a small radiator...you will have engine overheating problems eventually costing you an engine change or expensive repair.

Do not use 415b refrigerant. It is highly flammable & not compatible with the materials.

Find a good a/c shop to put things together for you. A shop that uses pure R134a & not a tank just labelled R134a or 415b. You need PAG DEC oil not ester oil. Many professional a/c shops have refrigerant identifiers & could prove the purity of the refrigerant they are using.

Cut corners with a/c & you will watch your money flowing down the drain. We are not just trying to sell our parts to you, we supply you with the correct parts & support for you to fix it right the first time & save you money.

Ask me for any advice you need, I will help you although you not supporting our business, it kinda hard to see a brother spending money & don't know what he doing or getting himself into.


well bro i hear what u saying and thanks for the advice

the condenser that the van had on it was this exact universal one which i realized after making the purchase. so i not doing bad by replacing with the same thing.

it may not be ideal or newest technology but i guess i'll be the guinea pig yet again. also its not a new vehicle so its a 10yr old compressor so maybe the older gas system would be ok? from what u saying i would also need to change the compressor too right?

what i want to know is how come when i called i was not given any of this information nor told about the condenser options? also, if the other condenser is total crap then y r u still selling it?

User avatar
PARTS2go
3NE 2NR for life
Posts: 197
Joined: September 13th, 2011, 11:14 am

Re: Build Project: Suzie!!

Postby PARTS2go » October 20th, 2012, 11:07 pm

I saw the pics of the van & the condenser is designed for the phased out R12 gas. We sell them for the same reason you bought it, some people don't want to spend their money. Our retail staff are just that, they are not technical.

It does not matter how old the van is, what matters is there us no R12 refrigerant & you cannot operate R134a in a system designed for R12. It will not cool properly & damage components.

Let's say there is no more gasoline, would you just fill up with diesel?

User avatar
neckto
I LUV THIS PLACE
Posts: 919
Joined: July 7th, 2003, 10:03 am
Location: DIY - ing
Contact:

Re: Build Project: Suzie!!

Postby neckto » October 21st, 2012, 6:59 am

PARTS2go wrote:I saw the pics of the van & the condenser is designed for the phased out R12 gas. We sell them for the same reason you bought it, some people don't want to spend their money. Our retail staff are just that, they are not technical.

It does not matter how old the van is, what matters is there us no R12 refrigerant & you cannot operate R134a in a system designed for R12. It will not cool properly & damage components.

Let's say there is no more gasoline, would you just fill up with diesel?


so im asking again, because of the unavailability of the old gas, that means i have to change all my components including the compressor then?

User avatar
heavyweight280
3NE 2NR for life
Posts: 124
Joined: June 22nd, 2011, 12:22 pm
Location: USA

Re: Build Project: Suzie!!

Postby heavyweight280 » October 21st, 2012, 12:18 pm

probably too late, but I find dry ice makes removing that tar /sound deadener much easier. I did that on my Z, and it saved a lot of time. Just let it sit for about 15 mins, then whack it with a rubber mallet and it brakes into nice solid pieces

User avatar
neckto
I LUV THIS PLACE
Posts: 919
Joined: July 7th, 2003, 10:03 am
Location: DIY - ing
Contact:

Re: Build Project: Suzie!!

Postby neckto » October 21st, 2012, 12:20 pm

heavyweight280 wrote:probably too late, but I find dry ice makes removing that tar /sound deadener much easier. I did that on my Z, and it saved a lot of time. Just let it sit for about 15 mins, then whack it with a rubber mallet and it brakes into nice solid pieces


waow..........so it lets go of the metal too?

User avatar
heavyweight280
3NE 2NR for life
Posts: 124
Joined: June 22nd, 2011, 12:22 pm
Location: USA

Re: Build Project: Suzie!!

Postby heavyweight280 » October 22nd, 2012, 12:46 am

neckto wrote:
heavyweight280 wrote:probably too late, but I find dry ice makes removing that tar /sound deadener much easier. I did that on my Z, and it saved a lot of time. Just let it sit for about 15 mins, then whack it with a rubber mallet and it brakes into nice solid pieces


waow..........so it lets go of the metal too?


for the most part, yeah, nice and clean too. It helped get all the floor done. Just scatter the dry ice over the area, wait a while, then hit it with rubber mallet, not to hard, and it breaks, some times in large chunks, like tile. No clue how many hours it saved, cause that stuff is hard to get off :( i still have some on my transmission tunnel and all the vertical areas. Still gotta chisle them off :(

Either way, as I mentione, this project is really inspiring :) , would love to see this finish

User avatar
neckto
I LUV THIS PLACE
Posts: 919
Joined: July 7th, 2003, 10:03 am
Location: DIY - ing
Contact:

Re: Build Project: Suzie!!

Postby neckto » October 22nd, 2012, 10:25 am

heavyweight280 wrote:
neckto wrote:
heavyweight280 wrote:probably too late, but I find dry ice makes removing that tar /sound deadener much easier. I did that on my Z, and it saved a lot of time. Just let it sit for about 15 mins, then whack it with a rubber mallet and it brakes into nice solid pieces


waow..........so it lets go of the metal too?


for the most part, yeah, nice and clean too. It helped get all the floor done. Just scatter the dry ice over the area, wait a while, then hit it with rubber mallet, not to hard, and it breaks, some times in large chunks, like tile. No clue how many hours it saved, cause that stuff is hard to get off :( i still have some on my transmission tunnel and all the vertical areas. Still gotta chisel them off :(

Either way, as I mentioned, this project is really inspiring :) , would love to see this finish


would've liked to try this method too for myself, well good luck with the rest of the removal i know how painstaking it can be, and thanks for the great tip im sure a lot of ppl will benefit from that.........this is what it's about

User avatar
neckto
I LUV THIS PLACE
Posts: 919
Joined: July 7th, 2003, 10:03 am
Location: DIY - ing
Contact:

Re: Build Project: Suzie!!

Postby neckto » October 22nd, 2012, 10:43 am

update:

managed to get a little done after work yest evening

not much, just get the pre paint prep work going

Image

removed the rear windscreen

Image

starting to want to take out the dash and front glas too but sticking to plan

Image

Image

completed the welding and clean up the vertical sections too

looking good already, still panting tho cause i dont like silver
Image

User avatar
Cooper
3NE2NR Diesel Boyz
Posts: 1525
Joined: July 28th, 2003, 7:47 am

Re: Build Project: Suzie!!

Postby Cooper » October 22nd, 2012, 11:10 am

By the time you finish this vehicle will look like it just came out of the showroom :!:

User avatar
droppa
punchin NOS
Posts: 4191
Joined: January 2nd, 2004, 9:20 am
Location: when in doubt, use 4Lo!!!!!!

Re: Build Project: Suzie!!

Postby droppa » October 22nd, 2012, 11:29 am

yuh real goin all out and doing this in-depth and thorough hoss, i hope when you done this build you dont sell it, but actually take some time and enjoy the fruits of your labour!!!!!!!

User avatar
neckto
I LUV THIS PLACE
Posts: 919
Joined: July 7th, 2003, 10:03 am
Location: DIY - ing
Contact:

Re: Build Project: Suzie!!

Postby neckto » October 22nd, 2012, 12:35 pm

Cooper wrote:By the time you finish this vehicle will look like it just came out of the showroom :!:


that's providing i don't try painting the outside myself too lolz...... i still trying to man up to taking that part on

User avatar
neckto
I LUV THIS PLACE
Posts: 919
Joined: July 7th, 2003, 10:03 am
Location: DIY - ing
Contact:

Re: Build Project: Suzie!!

Postby neckto » October 22nd, 2012, 12:43 pm

droppa wrote:yuh real goin all out and doing this in-depth and thorough hoss, i hope when you done this build you dont sell it, but actually take some time and enjoy the fruits of your labour!!!!!!!


yea bro, u was right too she done growing on me........ :x-mas:

User avatar
jpec
Sweet on this forum
Posts: 284
Joined: June 20th, 2011, 8:54 pm

Re: Build Project: Suzie!!

Postby jpec » October 22nd, 2012, 2:17 pm

why don't you want to take out the dash and front glass? you might as well do it since its all basically down to skull and bones :D

User avatar
neckto
I LUV THIS PLACE
Posts: 919
Joined: July 7th, 2003, 10:03 am
Location: DIY - ing
Contact:

Re: Build Project: Suzie!!

Postby neckto » October 23rd, 2012, 6:50 am

jpec wrote:why don't you want to take out the dash and front glass? you might as well do it since its all basically down to skull and bones :D


i wanna but we agreed to not do that from before so i sticking to plan.......i'll most likely open it up from the front to clean up and repair etc.

User avatar
neckto
I LUV THIS PLACE
Posts: 919
Joined: July 7th, 2003, 10:03 am
Location: DIY - ing
Contact:

Re: Build Project: Suzie!!

Postby neckto » October 23rd, 2012, 10:53 pm

update:

Finally finished the preping this afternoon and as able to put on the primer. for how this floor was i dont think regualr 2k paint gonna cut it so we going hardcore in here too, zinc oxide primer, then industrial enamel. then the flash band, then the 2 k paint system on top it all.

Image

Image

Image

Image

Image

Image

also got the drier filter bottle for the AC

and finally remembered to prime the bonnet hinges and fuel tank goose neck too

User avatar
jpec
Sweet on this forum
Posts: 284
Joined: June 20th, 2011, 8:54 pm

Re: Build Project: Suzie!!

Postby jpec » October 23rd, 2012, 11:12 pm

decided on an exterior colour? looks great now, can't wait for this to be finished. tops work man

User avatar
neckto
I LUV THIS PLACE
Posts: 919
Joined: July 7th, 2003, 10:03 am
Location: DIY - ing
Contact:

Re: Build Project: Suzie!!

Postby neckto » October 24th, 2012, 7:26 am

jpec wrote:decided on an exterior colour? looks great now, can't wait for this to be finished. tops work man


so far all i cme up with is white with some of the blue dust like in the engine bay and probably a blue wrapping around the lower half

User avatar
jpec
Sweet on this forum
Posts: 284
Joined: June 20th, 2011, 8:54 pm

Re: Build Project: Suzie!!

Postby jpec » October 24th, 2012, 9:57 am

hmm...what about pearl white with the dust and no blue wrapping around the lower half??.. a lot of possibilities :!: :lol:

User avatar
neckto
I LUV THIS PLACE
Posts: 919
Joined: July 7th, 2003, 10:03 am
Location: DIY - ing
Contact:

Re: Build Project: Suzie!!

Postby neckto » October 24th, 2012, 10:04 am

jpec wrote:hmm...what about pearl white with the dust and no blue wrapping around the lower half??.. a lot of possibilities :!: :lol:


whichever option looking better for the price with the white, when the white done if it looking good then i wouldnt bother with the blue

User avatar
jpec
Sweet on this forum
Posts: 284
Joined: June 20th, 2011, 8:54 pm

Re: Build Project: Suzie!!

Postby jpec » October 24th, 2012, 4:16 pm

neckto wrote:
jpec wrote:hmm...what about pearl white with the dust and no blue wrapping around the lower half??.. a lot of possibilities :!: :lol:


whichever option looking better for the price with the white, when the white done if it looking good then i wouldnt bother with the blue


sounds like a plan! you changing the rims btw?

User avatar
neckto
I LUV THIS PLACE
Posts: 919
Joined: July 7th, 2003, 10:03 am
Location: DIY - ing
Contact:

Re: Build Project: Suzie!!

Postby neckto » October 24th, 2012, 9:02 pm

eventually i would, not a priority tho. this project is very demanding budget wise as is

User avatar
neckto
I LUV THIS PLACE
Posts: 919
Joined: July 7th, 2003, 10:03 am
Location: DIY - ing
Contact:

Re: Build Project: Suzie!!

Postby neckto » October 24th, 2012, 9:42 pm

update:

sprayed on the industrial enamel black on the flooring

and mounted up the condenser and fan and put bk the bracket etc

Image

changing the fan too, going with a bigger 12" fan one time

Image

Image

Image

Image

Image

Image

Image


i hope i got the placement of the fan correct. is there a reason for it to be placed a little to the side instead of directly in the center of the condenser?

i also made a bracket for the brace going over the fan to fit properly since the repair we did underneath was fabricated a little narrower than the original cross section
Image

User avatar
ruffrider27
Riding on 16's
Posts: 1269
Joined: January 27th, 2008, 9:06 am
Location: Ontario

Re: Build Project: Suzie!!

Postby ruffrider27 » October 25th, 2012, 6:37 am

project: Suzie cost you how much so far ?

User avatar
neckto
I LUV THIS PLACE
Posts: 919
Joined: July 7th, 2003, 10:03 am
Location: DIY - ing
Contact:

Re: Build Project: Suzie!!

Postby neckto » October 25th, 2012, 7:33 am

will do a costing at the end, im not sure at the moment. avg around 35K or so by now - minus labour off course that's priceless!!

User avatar
Bizzare
TriniTuner 24-7
Posts: 10873
Joined: June 2nd, 2010, 12:26 pm
Location: I'm in it

Re: Build Project: Suzie!!

Postby Bizzare » October 25th, 2012, 3:26 pm

wow, this is really amazing. Rel passion going into this project.
reminds me of the major restorations we did back when I was younger.
While reading this ched i smelling filler and paint.
Hire meh tuh run paint on the outside. glossy finish with no runs guaranteed :mrgreen:

User avatar
neckto
I LUV THIS PLACE
Posts: 919
Joined: July 7th, 2003, 10:03 am
Location: DIY - ing
Contact:

Re: Build Project: Suzie!!

Postby neckto » October 25th, 2012, 8:58 pm

Bizzare wrote:wow, this is really amazing. Rel passion going into this project.
reminds me of the major restorations we did back when I was younger.
While reading this ched i smelling filler and paint.
Hire meh tuh run paint on the outside. glossy finish with no runs guaranteed :mrgreen:


how much would u charge (labour) to do the final filler/putty and to paint n fnish and to line bk up the doors, bonnet, bumpers etc properly?

User avatar
Bizzare
TriniTuner 24-7
Posts: 10873
Joined: June 2nd, 2010, 12:26 pm
Location: I'm in it

Re: Build Project: Suzie!!

Postby Bizzare » October 25th, 2012, 9:15 pm

nah I was jus joking :lol:
we quit doing auto body repairs a while now.
over 3 yrs since i hold a paint gun.

User avatar
neckto
I LUV THIS PLACE
Posts: 919
Joined: July 7th, 2003, 10:03 am
Location: DIY - ing
Contact:

Re: Build Project: Suzie!!

Postby neckto » October 25th, 2012, 9:37 pm

update, sorry no pics today.

Got kept back going to buy materials and did a couple little things this evening which took longer than anticipated. so i forgot about pics

Cleaned and primed and painted drain caps which were coated with wonder the night before, put body guard on the floor drain holes and caps and stuck them back in - hopefully the tar will reseal the caps

put some body guard on the patched floor areas and corners of flooring. i will give that a two days to dry. then put on the flash band dampener.

primed, paint and replaced the piece of metal on the floor which i believe to be a weight of some sort

primed and painted the bonnet hinges and the diesel tank goose neck

repaired and reassembled the headlight brackets and temporarily mounted the headlights - had to find clips and adjustment springs which took forever

sort out most of the electrical in the front and get the head light working on both beams and the park lights. just have the bumper lights to check.

re-installed the horn and get it working.

so just the bumper lights, AC fan and compressor and head light's park light sockets to replace and the engine bay and front electrical supposed to be complete, oh yea. temp gauge to be checked by electrician

Advertisement

Return to “Trucks & Pickups”

Who is online

Users browsing this forum: No registered users and 8 guests