Flow
Flow
TriniTuner.com  |  Latest Event:  

Forums

TriniGT's Forester Cross Sport Daily Driver Resurrection

Automotive Non-Technical topics... Just anything car related for the gear head in all of us

Moderator: 3ne2nr Mods

User avatar
TriniGT
punchin NOS
Posts: 4293
Joined: May 6th, 2003, 12:22 pm
Location: Home Playing DIYer

TriniGT's Forester Cross Sport Daily Driver Resurrection

Postby TriniGT » January 11th, 2012, 8:29 am

This project has been ongoing for the balance of this year and is almost fully completed before I take it to stage II for some power upgrades. I will try to be as brief as possible from how I got the vehicle and what was done over the current year. Story is that my bro purchased an '06 Cross Sport Forester through Crism a couple of years back and over time the car was just never taken care of, car was lovely but never serviced regular and over time it began to deteriorate. Starting his new business he needed to get something more suited so he decided that he would have sold the car, I always told him that if selling check me as I drove it once or twice and it never let me down. Weeks from receiving his new vehicle he got in an accident, the forester was a wreck, I could not believe .

The insurance didn't offer him much for the wreck so I told him to keep it and I would take it off his hands. What a shame as this cross sport came with lots of STi stuff even though it didn't have the STi logo on most anything. Anyway, moving on now so I wrecked the car home after much a conversation with both mom and wifee, I needed to scrap the entire front end to see what the damage was and what sort of damage the engine took as well. Damn was not a nice sight, removed the smashed HID headlights, mangled condenser and radiator had to be cut out as the front end was jammed totally against the engine. It seems that the car had direct impact on the passenger side chassis and it looked to have been crumpled llike a harmonica, seriously. The entire engine twisted and the transmission was jammed into the tunnel and the driveshaft was bent as well so the car could not even roll on its own.

Now began the fun part, removing the engine, I disconnected all harnesses from the engine in an effort to remove it but then decided that raising the engine up and out was the only option. I decided to drain the transmission and remove that to make the engine out problem easier. Transmission dropped out with not much problems besides dislocating my shoulder, long story. Biggest issue was removing the downpipe from the turbo as it was jammed against the booster. In the end after three to four hours and stripping a converter bolt I was able to remove the exhaust and the engine, for a first-timer on a subaru and a wrecked one it was not too bad. Decision was made to leave the crossmember in as the passenger side was bent to much that if taken off it may not have been able to go back on. Looking at the engine bay now the firewall was impacted and now I could really assess the damage from the accident.

Next move, stripping the interior, this was easy and in the space of two hours most of the interior was out. The blower setup was cracked up as it jammed against the dash bar and is all broken, the instrument panel as well is a little cracked as well but on further review I will have to use it as it is not a regular setup, will touch on that later. So interior is scrapped, seats are mint, looks like STi non-embroidered seats, not the regular fabric or leather material, seat belts are locked from the impact. So now let me give an further update what has been done since then. I have made several trips to Neal and Massy, bought the last front fenders at a discounted price, got the last new non-turbo bonnet from Gobin, the resident Subaru parts man, as N&M did have a turbo bonnet or non-turbo for that matter. Priced replacement HID headlights and they came up to $11,000 ($1800USD) each before discount, that was not an option, choice at that point was to get a non-hid setup and retrofit the HID setup in it or pay $7,000 ($1100USD) for them outside which was still heavy for my as budget did not cater for that expense. My next step was a brave one, I spoke with my friend in Japan and bidded on some HID headlights, scored them at a very good price and had them shipped to me. I also decided to bid on an entire air bag setup from an SG5 and won that and had those items shipped to a friend in Japan and packed in a container to be brought in.

While parts were being shipped in I began cleaning the carpets and mats and whatever I could to past time and eventually I got my hands on the headlights which were in mint condition and a two months later I received my air bag setup. I removed the dash bar and some harnesses from the engine bay passenger side so that whenever the car had to go to be straightened I would get the best job possible with notihng being in the way. Now we move to a three weeks ago, car was wrecked to the shop to be pulled and straightened, a front half was purchased, no exterior or engine and transmission but all other harnesses and really what I needed. Plan was to swap the entire passenger side chassis and apron and the front radiator panel. The straightener began the process of pulling and realised that while he was able to get the firewall sorted the chassis was in a mess so it had to be drilled and removed. A day later I came to find the entire left side removed and he began unsweating the needed parts from the front half. All harnesses and whatnot were stripped and labelled and boxed for future purposes. I was also able to score on a reinforcement bumper bar, left and right side L-frames along with some other pieces that I would have eventually needed.

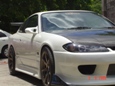
Revisited the straightener to find the front-end on and loooking somewhat like a car again, problem time, the fenders and bonnet fit no problem but the headlights do not fit, seems that the older model radiator panel is a little different form the '06 model radiator panel, well luck would have it that I purchased the last radiator panel months before and was actually trying to sell it, good thing I didn't and bit the bullet and had him unsweat the older model panel and fit this one. In the end now the headlights fit, bumper support, fenders, bumper, crossmember, steering rack ........ EVERYTHING!!!! My only problem now is that the repaired bumper has stretched and does not fit proper so I will have to take the vehicle over to have the bumper cut and rewelded to fit properly, I would have bought a new bumper but they do not have this model STi bumper locally so will have to get it fixed somehow. Sorry for being this wordy but will edit with pictures where possible.

The damage,
Image
Image
Image
Image
Image
Image
Image
Image
Image

User avatar
TriniGT
punchin NOS
Posts: 4293
Joined: May 6th, 2003, 12:22 pm
Location: Home Playing DIYer

Re: TriniGT's Forester Cross Sport Daily Driver Resurrection

Postby TriniGT » January 11th, 2012, 8:30 am

Work Begins After The Damage is Assessed, Passenger Side Apron and Chassis Stretched and Removed
Image
Image
Image
After Stretching the Car and Removing the Apron and Chassis the Firewall is Taking Shape
Image

User avatar
TriniGT
punchin NOS
Posts: 4293
Joined: May 6th, 2003, 12:22 pm
Location: Home Playing DIYer

Re: TriniGT's Forester Cross Sport Daily Driver Resurrection

Postby TriniGT » January 11th, 2012, 8:31 am

When I saw it in the state above I was feeling a bit wierd wondering if it made sense. Next time I came the entire SG5 passenger chassis and apron was tacked on for fitment and final welding and there is where we saw the problem. If ever see an SG5/SG9 Radiator Panel, the fenders and bonnet and support bar fits without problem but the headlights won't
Image
Image
Image

User avatar
TriniGT
punchin NOS
Posts: 4293
Joined: May 6th, 2003, 12:22 pm
Location: Home Playing DIYer

Re: TriniGT's Forester Cross Sport Daily Driver Resurrection

Postby TriniGT » January 11th, 2012, 8:31 am

Pics of the car home after collecting her with the SG5/SG9 Radiator Panel in place and everything fitted
The Fleet
Image
Car Home with Non-Turbo Bonnet Awaiting Some Surgery
Image
Image
Yes STi Enkei 17's, this side bumper to fender fitment is fine
Image
This is the side that has the bumper to fender fitment issues, the bumper was hit and stretched so needs cutting and rewelding
Image
Project Profile Shot :D
Image
Tunnel Work after the Transmission and Driveshaft Did its Damage
Image

User avatar
TriniGT
punchin NOS
Posts: 4293
Joined: May 6th, 2003, 12:22 pm
Location: Home Playing DIYer

Re: TriniGT's Forester Cross Sport Daily Driver Resurrection

Postby TriniGT » January 11th, 2012, 8:32 am

The Wheel Well after the new apron was attached, treated somewhat but further will be done
Image
New Apron and Chassis, Nice and Straight, just needs some Cleaning, Treating and Sealant applied and then Engine Bay to be Primed
Image
Two Pieces need to be Drilled Out as the SG5/SG9 does not have the Washer Bottle in the Engine Bay
Image
Image
Engine Bay will be thoroughly stripped of booster, brake lines and all rubbers to have the engine bay treated sealed and primed and sprayed. What i really like about the job is that the welds were done with a mig and the car was properly stretched before anything was unsweated and removed, now after everything was replaced the fenders were just bolted on, no widening of the holes anywhere.

User avatar
TriniGT
punchin NOS
Posts: 4293
Joined: May 6th, 2003, 12:22 pm
Location: Home Playing DIYer

Re: TriniGT's Forester Cross Sport Daily Driver Resurrection

Postby TriniGT » January 11th, 2012, 8:33 am

Well the update on the transmission I will copy from my other post. Oops it's all gone so let mwe give the transmission update. With the frontal impact somehow I could not remove the driveshaft/ propellar shaft from the rear of the transmission, needed to remove it because the driveshaft was bent.
Image
Image
Image
Then eventually I got frustrated and realising I would need both a new driveshaft and a new rear housing at least I decided to try removing the front cross on the driveshaft to take the rear housing to the machine shop to remove the center shaft and the clutches. Took a hammer to it to loosen things up and after some pounding I see that the driveshaft has come out a little from the back of the rear housing. With that now I forgot the cross and started beating the crap out of the driveshaft and after about five minutes of hammering the driveshaft came out. I inspected both splines and they looked alright, found some metal filings in the rear housing and thinking that may be the cause of the driveshaft not being able to slide out. The center shaft fits proper in the tranny and the clutches too fit without problem, the housing looks good enough to reuse but will need a thorough cleaning before I can refit it, I will change the rear ext housign seal to be on the safe side. Only thing I want to verify is that the center rear shaft has no problem working on a next driveshaft, if it may have become swollen from the impact, I am hoping not though. Pics or it didn't happen,
Ripped the shield off to see if that would have helped somewhat
Image
Image
Housing Looks Fine
Image
Rear Center Shaft
Image
Does anyone know if the rear Extension housing gasket is readily available at Massy or it will be an order item?
Clutches and what appear to be some sort of metal washerlike bearings that fit inside the rear housing, the thin washer like items will hopefully be replaced once I can find a replacement

Image

User avatar
TriniGT
punchin NOS
Posts: 4293
Joined: May 6th, 2003, 12:22 pm
Location: Home Playing DIYer

Re: TriniGT's Forester Cross Sport Daily Driver Resurrection

Postby TriniGT » January 11th, 2012, 8:34 am

So some updates, entire front end is scrapped to prep the engine bay for some work, looking at sealing the entire engine bay where needed as the new apron and chassis is in there. So the teardown process began.
Image
Tried to get a clearer pic of the new aprone refitted
Image
Harness and Damaged Brake Booster Removed
Image
Ready for Degreasing and Resealing with the Caulk Sealeant
Image
Image
Image
Image
A Quick Wash!!!
Image
Image
Image
Image
Image
Image
Shop only had one Tin of Grey Primer did what I could, which was the Driverside and Most of the Radiator Panel
Image
Image
Still have to Tape off the Brakelines and Shock tops and whatnot to finish the Priming Process and then once dried over a day or two I will hit it with the Engine Enamel Black then I can begin Refitting Some of the Engine Bay Items
Tried To Get a Couple More Engine Bay Shots of Work Done
Image
The Black Piece on the Passenger Side was Drilled out and somewhat Straightened to be used as the SG5 Passenger Apron has the Washer Bottle Setup While the SG5/SG9 has a little Different Bracket, will get it Welded and then Treat and Prime and Paint
Image
Image

User avatar
TriniGT
punchin NOS
Posts: 4293
Joined: May 6th, 2003, 12:22 pm
Location: Home Playing DIYer

Re: TriniGT's Forester Cross Sport Daily Driver Resurrection

Postby TriniGT » January 11th, 2012, 8:36 am

Mini Project N/A Bonnet -> Turbo Bonnet ......Why, could not get one locally
After i bought the N/A bonnet which was hard to find as well, got the last one from a friend, I spoke with my sister and she told me she could have brought it in for me from the states which has is for small beans, ah well work already commenced. I will let the pics do the talking, I took my time and measured and measured and measured and then when ape****.
Old Bumper overlayed with rib skin removed, already cut in half
Image
Two 12mm bolts were run through the wiper washer holes to help with alignment
Image
Image
Stenciled out the inner scoop area
Image
Surgery - Slow and Painful
Image
Image
Tackled the outer areas somewhat
Image
Measure the overlay and trimmed uniformly around the scoop area but left the wiper hole area to be used to aligned everything
Image
Image
Image
Image
At that point I refitted the overlay and marked the new cutout area for the sides and the front area of the scoop, once that is done then I can safely trim the back area of the scoop to the right amount and mark it as well for the final cut
Image
Overlay fitted for final mark, you can see the ribs to the back have already been trimmed using the old bonnet layout as a guide
Image
Image
Image

User avatar
TriniGT
punchin NOS
Posts: 4293
Joined: May 6th, 2003, 12:22 pm
Location: Home Playing DIYer

Re: TriniGT's Forester Cross Sport Daily Driver Resurrection

Postby TriniGT » January 11th, 2012, 8:38 am

Finally got some half-decent weather and tackled the priming of the engine bay
The Engine Bay Prior to Complete Priming
Image
Image
All prepped, shock area taped along with brake lines and BMC moved for now, the ACE Spray from Bhagwansingh Works Wonders!!!
Image
Image
As you can see from the pic the upper firewall is battered, I will have to get the passenger side fillered and prepped properly
Image
Completed!!!
Image

User avatar
TriniGT
punchin NOS
Posts: 4293
Joined: May 6th, 2003, 12:22 pm
Location: Home Playing DIYer

Re: TriniGT's Forester Cross Sport Daily Driver Resurrection

Postby TriniGT » January 11th, 2012, 8:39 am

SG5/SG9 FTW. Well the car went off today at about 8:30AM. Still have a couple of things to sort out like the bonnet welding and pirror plastic covering for driverside but will do so in time. One pic of her on her way.
Image
Some pics of work on the bonnet for final fitment, I am hoping that the bonnet does not warp when it is tigged :(.
Image
Image
Image
My first HURDLE!!! As you can see the car is at the shop but I am busy running around trying to get the bonnet done to take it over. Got a call from the tig master Jimmy, problems, even at the lowest current level the bonnet is warping on contact. He tried over and over and in the end was only able to tack weld the entire thing. He reassured me that it is very strong but the finish is far from what I was looking at. He tried to grind down the tack welding as well but it was still pretty bad, not his fault as he is a fella that takes pride in his work, it's just that the aluminum is so thin it created lots of problems. He suggested I find a fibreglass man to now prep the area and fill in the gaps with resin and glass and thenrub it back to make it appear to be flat looking. So now the hunt is on for a fibreglass man capable of fixing the eyesore and having the scoop sealing properly. Anyone have any leads a on a proper fibreglass man to handle the job? Pics will follow just not getting the time. Needless to say the car is ready for priming, will need to pop on over and take some snappies.

User avatar
TriniGT
punchin NOS
Posts: 4293
Joined: May 6th, 2003, 12:22 pm
Location: Home Playing DIYer

Re: TriniGT's Forester Cross Sport Daily Driver Resurrection

Postby TriniGT » January 11th, 2012, 8:40 am

Cool will check when I get pay, money running low these days. Anyway, got back the bonnet from the fibreglass man, it looks half decent now so all that is needed is for the body shop to filler it and make it look even better, the indented area too will need some work but better than what I got from the tig man, not his fault though.
Image
Image
Can this starter motor be fixed or I need a completely different starter?
Image
Lastly, went to the shop and took a look at the car, it has already been filled and flattened, just needs priming and then flattening again and then base and clear. The front end has been removed, bracket for engine bay in the process of being attached and the door interiors removed and tailight gone as well. Spoke with the guy there and he advised me to get someone from licensing to see the firewall after the repairs and before the filler work in the event that they think otherwise. I told them if they are uncomfortable they can leave the firewall and just flatten and primer and paint it. What was a work of art is the bumper and how it has been given life, it looks nothing like it did after the accident, not a good pic but here it is nevertheless.
Image

User avatar
TriniGT
punchin NOS
Posts: 4293
Joined: May 6th, 2003, 12:22 pm
Location: Home Playing DIYer

Re: TriniGT's Forester Cross Sport Daily Driver Resurrection

Postby TriniGT » January 11th, 2012, 8:40 am

Car in the shop waiting on some primer and paint,
Image
Image
Passenger Side Exhaust Camshaft, the one I thought would have broken,
Image
Passenger Side Intake Camshaft, this is surprisingly the broken one as can be seen to the front of the cam,
Image
Image
Image
Image
Intake Thingamajig comprising of some sort of oil solenoid and camshaft sensor and as can be seen found on the intake side,
Image
Intake Cam Gear in perfect condition,
Image
Image
New Covers from Stealership,
Image
Image
Exhaust Cam Gear new from Massy, the last one :D,
Image
Passenger Side Valve Cover,
Image

User avatar
TriniGT
punchin NOS
Posts: 4293
Joined: May 6th, 2003, 12:22 pm
Location: Home Playing DIYer

Re: TriniGT's Forester Cross Sport Daily Driver Resurrection

Postby TriniGT » January 11th, 2012, 8:41 am

Much to do and some things I am not pleased with but will work I guess, needs tons of cleaning but it's a start,
Image
Image
Image

User avatar
TriniGT
punchin NOS
Posts: 4293
Joined: May 6th, 2003, 12:22 pm
Location: Home Playing DIYer

Re: TriniGT's Forester Cross Sport Daily Driver Resurrection

Postby TriniGT » January 11th, 2012, 8:42 am

Thanx, some small but updates nonetheless, worked on the wiring harnesses for the engine bay today, ran the harnesses that were in the cabin back through both sides into the front, passenger side harness was in a mess from the accident, fuse box was in pieces and needed to take the fuse box form the front half and repin every single wire. Luckily I had the original fuse box cover and used it as a reference. Here we go,
Grill fitted, fitment looks alright but not to my satisfaction due to the bumper not being done properly, this will need to be redone at a later date.
Image
Image
engine bay after refitting the Brake booster and cylinder and ABS setup along with soem lines,
Image
Now the painstaking part, repinning the fus box,
Image
After an hour or two the result,
Image
Another task which will happen this week and when the interior has dried properly,
Image
My once cleaned trunk area,
Image
Plexi needs redoing as it is broken, problem is getting a thick piece like this and then cutting it this neat,
Image

User avatar
TriniGT
punchin NOS
Posts: 4293
Joined: May 6th, 2003, 12:22 pm
Location: Home Playing DIYer

Re: TriniGT's Forester Cross Sport Daily Driver Resurrection

Postby TriniGT » January 11th, 2012, 8:43 am

A little more updates, I decided to strip the stereo surround of the sticky black trim and repaint it in fresh black. Got some Ace primer I had from before and then hit it some Harris interior Matte Black, the result.
Image
Stereo In :D,
Image
Rest of the interior pretty much buttoned up, you can see my different instrument panel and my STi Red Hazard button and my AEM/Turbo Timer/Boost Controller DIN Panel,
Image
STi Seats without the STi logo,
Image
Image
Enterior pretty much done just front windscreen to put on hopefully tomorrow as the fella from Double Zee set me up, yes that's meh new washer bottle, not sure how to mount it yet as the brackets were on the old piece that got replaced and now I don't have an idea of what it looks like :(.
Image
Engine coming along, much more done but need STi AVCS cams :(, also one or two things to figure out with the wiring. I need to drop the steering rack as it has a leak by the two short hard lines on the rack itself. Not sure if I can remove and reseal???
Image

User avatar
TriniGT
punchin NOS
Posts: 4293
Joined: May 6th, 2003, 12:22 pm
Location: Home Playing DIYer

Re: TriniGT's Forester Cross Sport Daily Driver Resurrection

Postby TriniGT » January 11th, 2012, 8:49 am

Finaly some more progress, vehicle is washable now, windscreen is installed :D.
Image
Image
One more piece to the puzzle, thanks Javish
Old vs. New - New Wins of course
Image
Yep looks the parts, just need to clean and polish the outer steering wheel.
Image
Also picked up an STi intercooler. Now the hunt for the infamous AVCS forester/STi/Spec C camshafts. One pic of more trasures awaiting installation.
Image

User avatar
TriniGT
punchin NOS
Posts: 4293
Joined: May 6th, 2003, 12:22 pm
Location: Home Playing DIYer

Re: TriniGT's Forester Cross Sport Daily Driver Resurrection

Postby TriniGT » January 11th, 2012, 8:50 am

Well got back the heads today, sorry no proper pics but the phone will have to do. Ferreas meet valve seats and the rest is history. All needed now is dismantle head and clean and reinstall and install valves with collets and new Ferrea valve seals and then install the heads along with the new Cometic Head gaskets. A couple snaps from my phone,
Image
Image
Image
Image
Engine is built and home, while she was out being built I took the liberty to claen the damaged side of the under car and underseal both front Wheel wells. First I individually removed each wheel and pressure washed the under area, the rear wheel arches were a complete mess, the front weren't as bad. After cleaning them and allowing to dry for a day I picked up five tins of the 3M rubber undersealant ($92 a tin for the big ones) and then applied it to the needed areas. Wow this is just what I was after, after the second coat I was pretty confident it was a decent job. A couple of snaps of the areas applied, you can also see the STi shock and spring setup, front and back
Image
Image
Image

User avatar
TriniGT
punchin NOS
Posts: 4293
Joined: May 6th, 2003, 12:22 pm
Location: Home Playing DIYer

Re: TriniGT's Forester Cross Sport Daily Driver Resurrection

Postby TriniGT » January 11th, 2012, 8:51 am

So onto the engine, new gears, Ferrea Valves, Gates Blue Timing Belt Kit, New Cam Seals, replacement AVCS Intake and regular Exhaust cams, Cometic Metal Headgaskets, Ferrea Valve Seals, new replacement outer cam gear covers and replacement inner covers as well and Twin-Scroll Sump with Baffle Plate and oil pickup and new rear pan seal and pickup seal, just need the TS dipstick now and also to transfer the sump bolt to the TS one (forgot to doohhhhh!!!). Cleaned the flap plate and converter and mounted the transmission. Had to resolder the entire sub-harness for the tranmission as in the accident it was cut in half. Gonna see if I can locate a replacement sub-harness. Same time I rotated the engine to catch the four converter bolts for the transmission, everything turned pretty nicely. At this point I need to service my starter so that is my project tomorrow and then once mounted I may take the chance and install the engine and transmission as one, any hints? I am now gonna remove the exhaust header as I heard they can get in the way. Also replaced the busted forester engine mounts with Subaru WRX/STi mounts, thought they wouldn't fit but they do :).
Image
Image
Image
Image
Image
Plan is to put the front on stands and remove both front suspension and then go underneath and clean and dry the car and then underseal the tunnel area and where ever else needs it and then tackle the engine install with engine and transmission together and then once done (hopefully) I will remove the front axels seals and replace and await the rear transmission seal before the driveshaft is installed and buttoned up. After the engine install I will also try to get the front end completed and install the Mishimimoto rad and condenser, still have to get the B&M transmission cooler, will install the STi TMIC and finish hopefully everything else and reinstall the suspension. Fun times ahead .

User avatar
TriniGT
punchin NOS
Posts: 4293
Joined: May 6th, 2003, 12:22 pm
Location: Home Playing DIYer

Re: TriniGT's Forester Cross Sport Daily Driver Resurrection

Postby TriniGT » January 11th, 2012, 8:51 am

Okay work commenced at 8:30AM and came in at 6:30PM, got a lot of small things done and also got the engine in it's final resting place, yes she is HOME!!! Day started with reinstalling the steering rack and the stabalizer bar and at the same time removing the front knuckles and axles to make way for the engine to be dropped in. After the knuckles and axles were removed I got on with tightening the converter bolts with the help from a friend that held the crank in position while I pulled on the converter bolts. Once that was doen I reinstalled the metal shield and began prepping the engine for install. The headers had to be removed as I had installed them in anticipation, in so doing I broke an exhaust bolt so tomorrow I will be poicking up some extras.

The engine installation actually took around fiftenn minutes and then I managed to jack the trnamission and fit the mount and bracket. Surprisingly the WRX/STi mounts worked without problem. I need to get a turbo gasket as when removing the engine from the wreck I ruined the gasket. Also want to replace the rear transmission seal as I think with everything is needs a replacement. I have new front diff axels seals which will go in tomorrow. Plan first is to drop out the front STi shock and springs and give them a good clean and treat any rusted areas and prime and paint in caliper red paint. Same time I will underseal any areas that were left out as the shocks were still in there for the initial spray. Once that is all done I will reinstall the suspension and drop the car back on the ground and see how the Sti springs finally look with the added engine weight and see if I need to change anything.

I will leave the stock down pipe and get the rest changed to my STi Kakimoto 3" setup and get some of the small wiring completed and hopefully be able to tumble the engine shortly after that. Of course tranny and engine fluids need to be had along with new front and rear diff fluids. Right now locating a transmission cooler, still deciding on the B&M or the Mishimoto one. Condenser and STi intercooler will be reinstalled and all other engine bay stuff along with my new Mishimoto Radiator. Still need to pickup my Samco Radiator hoses as well. Oil filter and tranny filter already purchased as well along with new fuel filter, all OEM items, replacement horns and passenger side fender liner ordered from Japan, should be with me in some time. Some pics,
Image
Image
Image
Image
Image

User avatar
TriniGT
punchin NOS
Posts: 4293
Joined: May 6th, 2003, 12:22 pm
Location: Home Playing DIYer

Re: TriniGT's Forester Cross Sport Daily Driver Resurrection

Postby TriniGT » January 11th, 2012, 8:52 am

Well the weekend was good for the forester, had some time to get a lot of small things done. So started off by running through the wiring in the engine bay, once that was done I looked through all my parts and found the needed hose from the valvecover to the intercooler, with that done I was able to close p the entire driverside of the engine bay. The power steering reservoir was fitted, lines run, steering rack fitted and tightened up, hoping for no leaks there, condenser refitted, oil filter changed, Mishimoto radiator fitted with replacement fans, the Mishimoto is a perfect fit and I am glad I went that route. Also ran the heater lines, intercooler brackets, overflow bottle and all the necessary rubber hoses.

Next I moved on to the dredded underneath where I needed to get the front suspension back on. First thing I did was to remove both the driverside front diff O-ring seal and rear transmission seal, wasn't too bag. After that I fitted the front knuckle and the axle back into the front diff and also the STi shock and spring and bolted them up and refitted the lower cradle and steering arm, did the same on the other side, saw a couple of surface rust spots so took care of them but by the tranmission bracket there is some that needs some grinding and priming and then some 3M undercoat action. Will take care of that during the week. The driveshaft was then reinstalled and the rear driveshaft shield was refitted, car is definitely taking some shape now, everything is fitting properly and I am satisfied thus far.

All needed now is some fluids and check for leaks and to install the STi intercooler and fit the dog bone mount to the back and also bolt down the engine mounts and refit the down pipe and give her a quick tumble to see if everything is fine then switch off and check for leaks, install wipers as I am ain't sure of the orientation right now, check the interior and air bag lights, check dashboard and then once all that is done get myself a bonnet lock as mine is thrashed. Hoping by next weekend she is running :D. A couple snaps but doesn't show anywhere near as to what happened this weekend.
Image
Image
Image
Image
Last edited by TriniGT on January 11th, 2012, 9:20 am, edited 1 time in total.

User avatar
TriniGT
punchin NOS
Posts: 4293
Joined: May 6th, 2003, 12:22 pm
Location: Home Playing DIYer

Re: TriniGT's Forester Cross Sport Daily Driver Resurrection

Postby TriniGT » January 11th, 2012, 8:53 am

When ready I will check around, so back to the problems at hand. Got a bit done today on the forester, oil filled, diff oil filled, tranny oil filled, need to get coolant tomorrow. Went underneath the car to realise that darn steering rack is leaking but from the top area where the steering column linkage is, not sure if a seal kit will fix it, will have to look into it. Anyone know the price for one? Also realised that the crossmember I have now is different from my original, there is a unit that bolts to the driverside and fits to the LCA, not sure what it's for but I will have to get the bracket welded into place to proceed, same time I will get the brackets for the washer bottle welded and then treated and painted and then sealed with undersealant. Got the B&M Supercooler installed and the hoses run as well. Still fiddling with the steering wheel as I find it isn't seat far enough down as if somethingis stuck in the spline, gonna recheck it again although I have cleaned it quite some, we'll see how that goes but for tomorrow I want to tumble and see what is what. Just two pics of the super cooler mounted.
Image
Image

User avatar
TriniGT
punchin NOS
Posts: 4293
Joined: May 6th, 2003, 12:22 pm
Location: Home Playing DIYer

Re: TriniGT's Forester Cross Sport Daily Driver Resurrection

Postby TriniGT » January 11th, 2012, 8:54 am

Okay, I looked around today for an STi rack but no luck. I decided to have a go at rebuilding the forester rack. Taking it off was a pain in the arse, as I had to remove linkage and driverside subframe. Anyway got rack off and started dismantling to see what I am working with, seems that water was in the rack, looks like a milky cream fluid, not strictly power steering fluid. The leak on my rack was as the top where the shaft fits into the linkage for the steering column so removed the dust shield to see what there was. Using the FSM I realized that below the dust cap there was a metal threaded seal that had to be unscrewed. It had four holes that I guess needed a tool to lock in and unscrew, I used a philip screw driver and a hammer, worked decent enough. After getting that off I reattached the linkage to the shaft and yanked on it, the inner spline came out with four seals as expected. Inside was also filled with more of that milky fluid. I drained it, now is the daunting task of finding the four replacement seals, and also the metal threaded locking facing had two seals, one to the outside and one to the inside sealing the shaft. A couple of pics,
Image
Image
Image
Image
Picked up seal kits from Massy and Adah, Adah really goes all out to help a fellow scooby in distress. There is an A and B seal kit, the B seal kit is from Massy and an original Forester one but the A seal kit is from Adah an is an Impreza one, the items I used seem to fit properly so may be an alternative. Some pics below, will only know tomorrow when it is installed if it leaks. The two hard lines are refitted but is there anytihng I can fit to the hardline threads for a proper seal, don't want to overtighten or strip the threads, any ideas and no not thread seal.
Image
Image
Image
Image
Image
Rack with new seals
Image

User avatar
TriniGT
punchin NOS
Posts: 4293
Joined: May 6th, 2003, 12:22 pm
Location: Home Playing DIYer

Re: TriniGT's Forester Cross Sport Daily Driver Resurrection

Postby TriniGT » January 11th, 2012, 8:56 am

Picked up a whitelane rack bushing setup. Now got home but just way too tired, will tackle the rack tomorrow.
Image

User avatar
TriniGT
punchin NOS
Posts: 4293
Joined: May 6th, 2003, 12:22 pm
Location: Home Playing DIYer

Re: TriniGT's Forester Cross Sport Daily Driver Resurrection

Postby TriniGT » January 11th, 2012, 8:57 am

Well got up this morning and installed the rack between rain showers and so far :fingers crossed: no leaks. Bled it and so far nothing, reinstalled the jack cover and stabalizer linkage and bled the brakes same time. Subaru has it passenger side then driver rear then driver front and then passenger rear. Used Motul 5.1 that I had extra and bled it thoroughly and so far everything is fine. Now all I need done is to fit some of the interior back on the dash stereo and route the ipod adapter. I still have to fit the two engine mount nuts and the exhaust brackets, can't seem to find the one that bolts the downpipe to the transmission at the end. Also have the other exhaust shield to refit but really a small job. Need a new lower engine shield, mine is thrashed, anyone know of one?

Okay some updates, so far the steering rack is fine, I did a lot of buttoning-up this weekend. I refitted the lower heatshield, stock exhaust, it seems to have been bent in the accident, or maybe the downpipe so it has all hangers on a strain. Has the car much quieter now, drilled two holes in the driverside crossmember and threaded two ten bolts through the sensor bracket and made that a done deal, could not wait on the welder and the weather was not the best for him to come. Here is the sensor I am talking about, not sure what the hell it is but it is back where it should be.
Image
Bent out-of-shape Exhaust,
Image
Getting there,
Image
Passenger side headlight is not mounted cause I have to deal with the washer bottle that is mounted just behind the bumper and comes through the passenger engine bay area, needs treating and neating and priming and painting, looks worse than it really is,
Image
Engine Shot, still using the stock TMIC as I needs to fab some brackets and also some sort of splitter for it, gonna try and angle the STi intercooler and make a splitter to suit
Image
Took a break in between working and the rain to play with the boss man,
Image
Okay back to work, Pressured the flat wheel and refitted both and lowered the car to finally see the STi shock and spring drop, it was exactly what I hoped it would be, not high and not low just right.
Image
Image
Image
Image
I am seeing one small coolant leak, I will remedy that, time for the first drive, start the car and put it in reverse and nothing. Check the tranny oil and it's way low, fill it and we have motion :D. I filled it with four and a half thinking that would be enough and still no go. I had drained the sump and removed the tranny and it slowly leaked fluid daily, may have leaked a bit I guess cause after six quarts of ATF it still not measuring on the dipstick much at all. Gonna pickup two more quarts tomorrow and see if that helps. The engagement of drive and more so reverse is harsh, it thuds, hoping the low oil may be the problem. I powered the music on and I have music but the power wire is somehow running close to the RCAs and cause major noise, will have to remove the interior and sort that problem, what a nightmare. The one headlight is tested and is working properly, HID FTW!!! Still need a bonnet lock and need to get the washer bottle brackets welded like yesterday. Let me know what you guys think of the progress, I am definitely beat working around the weather.

User avatar
TriniGT
punchin NOS
Posts: 4293
Joined: May 6th, 2003, 12:22 pm
Location: Home Playing DIYer

Re: TriniGT's Forester Cross Sport Daily Driver Resurrection

Postby TriniGT » January 11th, 2012, 8:58 am

So it's been a long fruitful weekend, just getting in from working on the car. Much was tried and a lot of stuff was accomplished. Things that I tackled was the powersteering, and the horrid noise from what was thought to be the transmission. Turns out I had a friend just accidentally turning the wheel while I was underneath the car and saw that the passenger side axle was shifting and making the same noise I was hearing. Got to realise that one of the bearings in the tripod was out and causing unecessary play in the axle boot and engaging the passenger side wheel late causing a loud t hud. I scrapped the axle and got me two tubs of grease to fresh the axle.
Image
Cleaned the cup and viewed the inside for wear but it looked pretty darn good,
Image
Image
Cleaned up the boot,
Image
Found this in the boot, appeared to be used to help align the tripod properly to fit into the cup, out it went,
Image
Said tripod with bearings back in place,
Image
C-clip used to keep the tripod in place on the cup end of the axle,
Image

Once that was done I refitted it and mounted back everything related to the passenger side, everything besides the steering arm as I picked up this bad boy for a swap :D,
Image
The one on top is an STi Steering Rack from a bug eye,
Image
As you can see it is pretty much identical to the forester rack and was an easy enough swap. In it went and then I crack the center hardline and topped up the reservoir and allowed it to flow through the hardline ensuring there was nothing foreign in there. Once that was done I rethreaded the hardline and began filling the reservoir and started the bleeding process. That went well.

Then I remembered that the lower coolant neck was seeping a little, had to drain the entire rad setup and seal it, it has a rubber seal but that was not doing the job so I added some silicone sealant and refitted the neck and then filled the overflow and then the radiator and capped it and started the engine and quickly finished bleeding the PS pump and topped up the small rad tank on the engine and allowed the car to warm up and then capped the radiator tank. In the end I got the radiator leak done, PS working fine, car just needs aligning, STi steering rack installed so only 1.5 turns for full lock, the horrid clunk when the drive and reverse was engaged. Only thing left now is to sort the music and then do some small things, will check my list on the previous page and see what's left, I am definitely stoked!!!

User avatar
TriniGT
punchin NOS
Posts: 4293
Joined: May 6th, 2003, 12:22 pm
Location: Home Playing DIYer

Re: TriniGT's Forester Cross Sport Daily Driver Resurrection

Postby TriniGT » January 11th, 2012, 8:59 am

Some more updates,

1. Major issue - Power Steering issue. DONE
2. Major Issue - Tranmission clunk when engaging either Reverse or Drive. DONE
3. Minor Issue - Braking System. DONE
4. Minor Issue - Music Feedback. DONE
5. Minor Issue - Key Fob Programming and cutting new key to work with locks and ignition.
6. Minor Issue - Bumper alignment.
7. Minor Issue - Washer Bottle. DONE
Took some snaps with the bumper somewhat fitted
Image
Image
Image
Passenger Side Front Bumper needs cutting and rewelding
Image
Trunk Area, needs some vacuuming, Fixed my music issue after scrapping the entire interior, deck needed the IC replaced :|. Don't underestimate the W3 JL 8", it thumps even better than in the skyline :D.
Image
The View from Behind,
Image
Image
Quick interior Shot,
Image

User avatar
wraith
Trinituner Peong
Posts: 424
Joined: February 10th, 2005, 3:54 pm
Location: Grenada
Contact:

Re: TriniGT's Forester Cross Sport Daily Driver Resurrection

Postby wraith » January 11th, 2012, 8:59 am

Wow thats allot of work but it's paying off in the end.

User avatar
TriniGT
punchin NOS
Posts: 4293
Joined: May 6th, 2003, 12:22 pm
Location: Home Playing DIYer

Re: TriniGT's Forester Cross Sport Daily Driver Resurrection

Postby TriniGT » January 11th, 2012, 9:01 am

Got tied up yesterday working on the car and lots of errands being Saturday and the only day places are open for business unlike blasted Sundays. Anyway got the spats and lip on and here are some pics, the extra kit does the car wonders :D. Let me know what you guys think?
Before
Image
After
Image
Image
Image
Image
Image
Image

User avatar
TriniGT
punchin NOS
Posts: 4293
Joined: May 6th, 2003, 12:22 pm
Location: Home Playing DIYer

Re: TriniGT's Forester Cross Sport Daily Driver Resurrection

Postby TriniGT » January 11th, 2012, 9:02 am

Picked up a spec C intake manifold for some future mods. Some of the plans are, VF37, 3" DP, 3" exhaust, APS inlet and CAI, injectors (maybe STi top feed), Twin scroll pipes and up pipe, walbro, STi intercooler, AVO wastegate, 3 port boost solenoid, ECUtek tune. Keeping it auto as it's a daily, has the buttons on the wheel to shift with sport mode, pretty nifty.
Spec C Intake Manifold with no TGV's,
Image
Thanks, ordered some other items, blue top feed STi injectors, APS turbo inlet and APS CAI. Next on the list is a Zero Sport Gauge Pod and some other small accessories. When they come in there will be some pics :D. VF37 turbo is shipped already just need to locate some Twin Scroll Piping locally or maybe some upgraded up and DP and headers and then I can begin some work. Legacy is being brought to a stock state and then sold, will get VF38 TS setup retune and full engine service with belts and tensioners, PS pump either fixed or replaced and a new clutch and pressure plate setup. Interior has already been brought in for both the center console and the A/C vents as I am removing the gauges from in between the vents and bring the interior to an acceptable sight. The exterior is gonna be repaired where needs it and reflashed, engine bay gonna be cleaned up and spot painted where the battery had leaked previously. Will update on that when the time is right but shouldn't be too bad actually.

User avatar
TriniGT
punchin NOS
Posts: 4293
Joined: May 6th, 2003, 12:22 pm
Location: Home Playing DIYer

Re: TriniGT's Forester Cross Sport Daily Driver Resurrection

Postby TriniGT » January 11th, 2012, 9:05 am

Ordered the Zero Sport Triple Gauge pod and looking for a RHD a-pillar pod for the 60mm defi I got. Also ordered a zero sport cooling panel as well. Have all these items on order or being shipped. VF37 is in country and need to get twin scroll piping and uprated 3" DP. Will be getting it retuned with an ECUTek flash, gonna try it with the 2.0l stock block and see what happens.
Picked up my TTpost Package, just came home and opened them up, seem to be in good condition,
My small Turbo Upgrade :D.
Image
Image
Image
Image
My Replacement Grill, will keep the last one as a spare,
Image

Advertisement

Return to “The Car Park”

Who is online

Users browsing this forum: No registered users and 9 guests