Flow
Flow
Flow
TriniTuner.com  |  Latest Event:  

Forums

Car Polishing 101

Tuning advice, problems and troubleshooting

Moderator: 3ne2nr Mods

User avatar
Alpha_2nr
punchin NOS
Posts: 3924
Joined: August 17th, 2005, 9:12 pm

Re: Car Polishing 101

Postby Alpha_2nr » March 29th, 2011, 2:19 pm

The key that most people I think miss (Karim...and I'm sure you'll appreciate what I'm saying) is MAINTENANCE of your detailed finish.

i.e. extending your wax/sealant's life etc etc.


E.g. you get your car professionally detailed...but you go and wash it down two days later with breeze/dishwash liq.


Doesn't make sense does it?


E.g. I've gotten three months of solid beading out of Mother's step 3 wax on my gf's car. And I mean REAL beading. The finish also passes the "squeak" test easily.

Of course, there are folks who've gotten only like 3 weeks to a month out of it. The key lies in surface prep prior to the detail, and the maintenance of that waxed surface AFTER that detail.

Also, I'm reading (in this thread) that some folks have had lack lustre results from XX product (whatever product that might be).

But you have to look at the products capabilities! E.g.While I could use Poorboy's Glaze to hide swirls, I wouldn't expect that finish for more than a week or two if used on its own!? I'd need to use a LSP on TOP of that glaze to get that longevity effect.

User avatar
Karim Khan
3NE 2NR Power Seller
Posts: 1035
Joined: July 16th, 2005, 10:55 pm
Location: Professional Detailer 784-9290

Re: Car Polishing 101

Postby Karim Khan » March 29th, 2011, 2:49 pm

^^^ I agree with you 100%. Proper prep work and Maintenance is the key.

Well said Alpha!

User avatar
Aaron 2NR
2NR phototakerouter
Posts: 6476
Joined: February 22nd, 2004, 9:28 am
Contact:

Re: Car Polishing 101

Postby Aaron 2NR » March 29th, 2011, 2:53 pm

karim i have to say...great job on the navara....truck looks really good! i was surprised when i got home and saw how it looked! for a vehicle over 2 years old, beating highway daily, sleeping in the driveway, the paint came back to life.....
the truck honestly never got a proper detailing job since it was purchased, just basic hang polish every few mths and the guys didnt even seem to be too educated on polishing..just apply polish and wipe off in 3mins.......

great job again.....cant wait to see how my civic looks when you're done with it

User avatar
Karim Khan
3NE 2NR Power Seller
Posts: 1035
Joined: July 16th, 2005, 10:55 pm
Location: Professional Detailer 784-9290

Re: Car Polishing 101

Postby Karim Khan » March 29th, 2011, 3:34 pm

Thank you very much Aaron. The reason why this truck looked so good is that i spend more time on prepping the paint to be polished.

The pic below is a 50/50 shot of the bonnet ( the pic did not come out so good as i was using the cam from my phone and the lighting was a bit poor ). If you look closely to the left you can see how bad the paint was. To the right you can see the finish before polishing and waxing. And just imagine the entire vehicle was washed before the photo.

Sorry guys i did not get chance to take out any after pics.

This is just to show the power of prep-work!
Attachments
Navara.JPG

User avatar
JUS4SHO
3NE 2NR Moderator
Posts: 9662
Joined: April 22nd, 2003, 11:06 am
Location: N/A
Contact:

Re: Car Polishing 101

Postby JUS4SHO » March 30th, 2011, 7:37 pm

karim did my 3 year old PCH lancer and my PCS 7 day old vitara both cars look better than when they drove out the showroom. i am still amazed at all the products , tools, methods and process employed. i just feel like wraping the cars in plastic and putting them on a shelf. i took some garage phone pics and will load them up soon... thanks again pal

User avatar
Karim Khan
3NE 2NR Power Seller
Posts: 1035
Joined: July 16th, 2005, 10:55 pm
Location: Professional Detailer 784-9290

Re: Car Polishing 101

Postby Karim Khan » March 31st, 2011, 2:30 pm

You are welcome, Jus4sho. I would like to thank you and your wife for being such wonderful host especially the tasty lunch.

I must say the 3year old Lancer was the real eye opener for me. The vehicle looked very good before i started, But when i reached the claying stage we were both amazed to see how much bonded contaminants were removed.Since the surface was free of all contaminants this set a good base for the polish. It assisted the polish to accept better to the paint and give a deep and high gloss.

Remember guys the most important step is your prep-work!!

User avatar
Chemical
I LUV THIS PLACE
Posts: 1048
Joined: May 17th, 2007, 3:09 pm

Re: Car Polishing 101

Postby Chemical » March 31st, 2011, 7:54 pm

Thanks Karim / Alpha...made a mental note of your points. BTW is the T/wax car wash good to use as I buy this from P/smart all the time or is there better out there ?

oxidation
Sweet on this forum
Posts: 369
Joined: October 14th, 2007, 12:12 pm

Re: Car Polishing 101

Postby oxidation » April 1st, 2011, 10:04 pm

^^ im beginning to think that this car wash helps in diminishing the life of the meguairs Nxt wax..

i use this wash and i really would like to try meg's gold class shampoo...

the nxt wax only last about a month max...

User avatar
Chemical
I LUV THIS PLACE
Posts: 1048
Joined: May 17th, 2007, 3:09 pm

Re: Car Polishing 101

Postby Chemical » April 3rd, 2011, 6:16 pm

^^FYI...http://www.autogeek.net/detailingtips.html

Follow the links on the left, lots of info plus online forums for detailers.

Karim / Alpha,

http://www.autogeek.net/cobra-waffle-weave.html

Looks pretty interesting !

User avatar
Karim Khan
3NE 2NR Power Seller
Posts: 1035
Joined: July 16th, 2005, 10:55 pm
Location: Professional Detailer 784-9290

Re: Car Polishing 101

Postby Karim Khan » April 3rd, 2011, 8:19 pm

OK guys this is what i did this weekend
Attachments
Audi1.jpg
Audi2.jpg
Audi4.jpg
Audi6.jpg

oxidation
Sweet on this forum
Posts: 369
Joined: October 14th, 2007, 12:12 pm

Re: Car Polishing 101

Postby oxidation » April 3rd, 2011, 9:15 pm

Chemical wrote:^^FYI...http://www.autogeek.net/detailingtips.html

Follow the links on the left, lots of info plus online forums for detailers.


yea dude tnx for the link but i already know about the site

:)

User avatar
Chemical
I LUV THIS PLACE
Posts: 1048
Joined: May 17th, 2007, 3:09 pm

Re: Car Polishing 101

Postby Chemical » April 4th, 2011, 6:35 am

Looks good Karim...the engine bay looked excellent. I saw Alpha bought the P21s but what I use is the simple green together with my pressure washer & I get excellent results.

Q. Have you ever tried using Simple Green ?

No learning curve, just spray all over & wash off. Fully environmentally safe for the water table.

User avatar
Dunman
3NE 2NR for life
Posts: 126
Joined: November 23rd, 2010, 10:14 pm

Re: Car Polishing 101

Postby Dunman » April 4th, 2011, 10:58 pm

Chemical wrote:^^FYI...http://www.autogeek.net/detailingtips.html

Follow the links on the left, lots of info plus online forums for detailers.

Karim / Alpha,

http://www.autogeek.net/cobra-waffle-weave.html

Looks pretty interesting !


Hey Chemical,

I have the waffle weave from cobra. I use it all to dry my van. It really is very absorbant and very gentle on the paint. However, it's very difficult to wring dry when it becomes saturated though, it's kindda too absorbant. I Just bought another and now the two large towels dry my van without any need to wring. :D

User avatar
Aaron 2NR
2NR phototakerouter
Posts: 6476
Joined: February 22nd, 2004, 9:28 am
Contact:

Re: Car Polishing 101

Postby Aaron 2NR » April 5th, 2011, 6:24 am

Chemical wrote:Looks good Karim...the engine bay looked excellent. I saw Alpha bought the P21s but what I use is the simple green together with my pressure washer & I get excellent results.

Q. Have you ever tried using Simple Green ?

No learning curve, just spray all over & wash off. Fully environmentally safe for the water table.


simple green is a really good product....ipsl use it by the barrels lol

User avatar
Karim Khan
3NE 2NR Power Seller
Posts: 1035
Joined: July 16th, 2005, 10:55 pm
Location: Professional Detailer 784-9290

Re: Car Polishing 101

Postby Karim Khan » April 5th, 2011, 7:05 am

Simple Green is really a great product- I used it in the pass and it gave me great results. Presently i use Meguiars Super Degreaser. This works great too!

User avatar
konartis
Shifting into 6th
Posts: 2119
Joined: January 11th, 2011, 11:22 am
Location: south

Re: Car Polishing 101

Postby konartis » April 6th, 2011, 6:31 pm

was reading this topic and learnt alot on types of waxes to use, but is there anything that takes out scratches from car door glass? or you guys know if anyone does it?

User avatar
Chemical
I LUV THIS PLACE
Posts: 1048
Joined: May 17th, 2007, 3:09 pm

Re: Car Polishing 101

Postby Chemical » April 10th, 2011, 3:55 am

Ok, so after spending probably a few hundred hrs reading on auto detailing etc I think in theory I fully understand the process & keeping the vehicle looking @ its peak condition.

Image

http://www.youtube.com/watch?v=nq6t8w-v ... re=related

(someone embed this for me pls)..thx

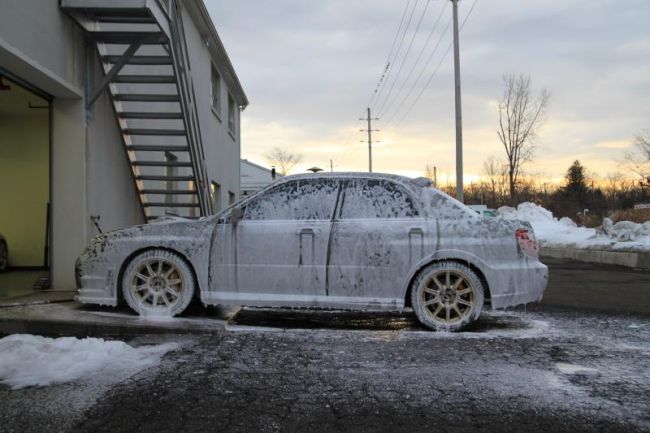
This presoak / car foam wash is what i'm trying to get. After all the research done this will eliminate swirl marks etc. Its purpose is to lift dirt, grime etc off the body of the car & trap it into the foam. Same principle as the latest car washes in Canada / States which is touchless.

(1) I'm thinking when using my p/washer to heat the water to a pretty high temperature & wash engine, wheel wells, wheels & body to loosen the dirt etc.

(2) Then apply pre-soak on car & simple green on engine & wheel wells. Let sit for approx 20 min for engine & 5 min for pre-soak, then rinse off with garden hose / p/washer.

(3) Once step 2 is finished, using running water, use a MF cloth & re-wash car.

(4) Finally drying will prob yield best results via high velocity blower after using the Hi-Tech Flexi Water Blade (made of surgical silicone) I tried the blower (high output) on the car & was amazed. It was borrowed !

WRT MF cloths, never wring it, squeeze it to remove water.

The p/washer I have is a Karcher 1600 psi so there is the bottle adapter to fit for the foam cleaner. Hadden & Co has stock of it or off amazon.

User avatar
Karim Khan
3NE 2NR Power Seller
Posts: 1035
Joined: July 16th, 2005, 10:55 pm
Location: Professional Detailer 784-9290

Re: Car Polishing 101

Postby Karim Khan » April 10th, 2011, 8:18 pm

Chemical. This technology is already in use in TnT. I use the Foam Master Gun for your normal garden hose as seen in the pic below.

Image

Let me know if you are interested in this unit i have it for sale.

User avatar
Karim Khan
3NE 2NR Power Seller
Posts: 1035
Joined: July 16th, 2005, 10:55 pm
Location: Professional Detailer 784-9290

Re: Car Polishing 101

Postby Karim Khan » April 11th, 2011, 7:21 pm

Ok guys this weekend i use the Meguiars Microfiber paint correction system.

I was amazed with the results of this product. I used it on one of the hardest clear coat systems and it gave really great results.
Products used;

Image

here is a pic of the vehicle
Image

Image

Image

User avatar
Chemical
I LUV THIS PLACE
Posts: 1048
Joined: May 17th, 2007, 3:09 pm

Re: Car Polishing 101

Postby Chemical » April 12th, 2011, 3:51 am

^^Looks really good.D'ont need the gun as I want to use the p/washer system where I need a much higher psi bottle. Did you use the flex on this? 1) After the finishing wax did you use a sealant?

2) Whats the diff betweent this & Tech wax 2.0?

3) Finally do you measure clear / paint thickness before starting on a paint job ?

I've read with the Meg's correction compound there is little possibility for swirl marks to be formed.

User avatar
Karim Khan
3NE 2NR Power Seller
Posts: 1035
Joined: July 16th, 2005, 10:55 pm
Location: Professional Detailer 784-9290

Re: Car Polishing 101

Postby Karim Khan » April 12th, 2011, 3:09 pm

Thank you very much Chemical for your complements. You would be happy with the Foam Gun I get great results with it. The up front cost is a bit high, but it’s all worth it in the long run.

The Microfiber system is a swirl free system and it is designed to be used with a Dual Action polisher. I used my Meguiars G110 D/A with this system. The results are amazing both the customer and I were surprised of the results. A deep wet look!

The finishing wax does seal the paint. Both waxes and sealants protect and seal the paint. The main difference between the two is that one is made of natural occurring materials (wax) and the other is made of synthetic materials.


The main difference between the Microfiber finishing wax and the NXT
is the finishing wax is designed to be used with the Microfiber pads and the Microfiber system and the Tech wax can be used as a stand alone system and it can be applied with hand.

I use the least aggressive method in paint correction. What does that mean?

There are many different grades of compound of the market, from the most aggressive to the least aggressive. Because the depth of all swirls and scratches are not equal, (some might be deeper than others) there are different grades of compounds. Most people in the industry use the most aggressive method for defect removal. This may result in the faster cutting and defect removal and less time to buff the car and more profits to the detailer as they can now do more cars in one day. But this method has its draw backs as it can remove more paint than what is needed. Because factory paint are very very thing , its not recommended to work with an aggressive product as you may run the risk of cutting too much paint which may cause paint failure. To make a long story short it is not good to use an unnecessary aggressive compound.

The method I use is the least aggressive method. I use compounds and polishes that are low in the abrasive scale. The main advantage with this method is that you remove the least amount of paint but the disadvantage is that it is very time consuming and very tiring.

But as a customer what do you prefer? Remove plenty unnecessary paint from your car or remove the least amount of paint. I would prefer to remove the least amount of paint from my car! The next big difference between the two methods is cost. You always find the person who uses the most aggressive method uses lest time and have a lower cost while the person who uses the least aggressive method and uses more time to save the paint will have a higher cost for the service. In the long run health for your car its better to go with the least aggressive method. If you are using this method you do not have any need for a paint thickness gauge. This is only necessary when you are wet sanding /micro finishing a car.

User avatar
Karim Khan
3NE 2NR Power Seller
Posts: 1035
Joined: July 16th, 2005, 10:55 pm
Location: Professional Detailer 784-9290

Re: Car Polishing 101

Postby Karim Khan » April 12th, 2011, 8:25 pm

Ok Guys More pics :Dedicated to my Evo Fans.

I tested the New Meguiar's Ultimate Polish and Wax this weekend and man it was amazing!

I must say this customer keeps his vehicles in pristine condition and i would like to say they are the best kept vehicles in Trinidad and Tobago. I would like to formally thank the owner for having me work on his vehicles.

Image

Here is vehicle:
Image

Vehicle under surgery:

Image

and the Ultimate Duo:

Image

User avatar
Chemical
I LUV THIS PLACE
Posts: 1048
Joined: May 17th, 2007, 3:09 pm

Re: Car Polishing 101

Postby Chemical » April 13th, 2011, 5:58 am

Thanx for the explanation...I take it you ment clear coat instead of paint. Evo looks as fine as my wife after her trip to the spa !

WRT the paint guage, it should measure the thickness of the deepest scratches & that should be the starting point in terms of relative depth to cut using the compound, thus saving time. Or is it possible to cut @ diff depths through out the surface of the car ?

I have not removed the swirls as I find Nissan's clear coats to be very soft so I just clay, & use the AG SRP. Toyota is a different story......real durable clears & beautiful pearl paints. I guess you get what you pay for, thats why Toyota's are approx 10 - 12 G's more over the rest.

User avatar
Alpha_2nr
punchin NOS
Posts: 3924
Joined: August 17th, 2005, 9:12 pm

Re: Car Polishing 101

Postby Alpha_2nr » April 16th, 2011, 1:29 pm

Chemical wrote:I have not removed the swirls as I find Nissan's clear coats to be very soft so I just clay, & use the AG SRP. Toyota is a different story......real durable clears & beautiful pearl paints. I guess you get what you pay for, thats why Toyota's are approx 10 - 12 G's more over the rest.


Evidence to support this? How have you gauged the durability of Toyota's clear coat?

In my understanding, softer paint finishes are easier to work with when it comes to swirl removal.

so I just clay, & use the AG SRP


I think you should go a few pages back and re read....again....since both Karim and myself have said it MULTIPLE times:

You may still have swirls because:

1) you're inflicting them with poor washing technique or using poor product application and removal technique

2) not using the product correctly

3) the fillers used in your product to fill and hide swirls are removed by poor m'tce afterwards.

Please review the posts in the previous pages for further insight, before you proceed.
Last edited by Alpha_2nr on April 16th, 2011, 7:41 pm, edited 4 times in total.

User avatar
Aaron 2NR
2NR phototakerouter
Posts: 6476
Joined: February 22nd, 2004, 9:28 am
Contact:

Re: Car Polishing 101

Postby Aaron 2NR » April 16th, 2011, 2:47 pm

Karim worked on my civic today....car is two years old this month......hold on to these

Image

Image

Image

Image

Image

Image

Image

Image

Image

Image

album:

http://www.facebook.com/media/set/fbx/? ... .503903960

User avatar
Alpha_2nr
punchin NOS
Posts: 3924
Joined: August 17th, 2005, 9:12 pm

Re: Car Polishing 101

Postby Alpha_2nr » April 16th, 2011, 6:01 pm

I use the same brush for engine details....works excellent!


Car looks great.....excellent job as always Karim. 8)

User avatar
jhonnieblue
Riding on 18's
Posts: 1781
Joined: November 14th, 2007, 10:17 pm

Re: Car Polishing 101

Postby jhonnieblue » April 16th, 2011, 7:34 pm

wow, car looks bess!!

User avatar
Chemical
I LUV THIS PLACE
Posts: 1048
Joined: May 17th, 2007, 3:09 pm

Re: Car Polishing 101

Postby Chemical » April 17th, 2011, 5:45 am

^^ To answer your question...stone chips all over the hood of the car. If the end of the hose hits the car softly its a chip..not the case with the other car.

Yes softer paint finishes are easier to work with but also easier to scratch etc.

Harder CC will req more agressive compounds & polishing pads but the machine / cutting compound does all the work. Its just knowing which one to use & experience will determing this..Karim the Honda looks great as usual.

Like I said bofore the car looks good from approx 2 ft & its not in use.

Toyota has developed a clear-coat paint with self-restoring qualities that is highly resistant to surface scratches usually caused by car wash brushes or fingernails. Unlike a conventional clear coat, Toyota's newly developed coat is not easily damaged and can even restore itself even if it is deformed. Moreover, it requires no special maintenance, prevents luster degradation caused by surface scratches and helps to prolong new-car color and gloss.

The new coat features an ingredient that encourages closer molecular bonding, resulting in a denser structure than conventionally possible. This gives the coat flexibility and elasticity, making it less prone to damage and more resistant to light and acid, and giving it the ability to self-restore after deformation.

http://www.fareastgizmos.com/transport/ ... lities.php

This Toyota also came with Beams undercoating...there is a sticker on the back glass.

User avatar
Alpha_2nr
punchin NOS
Posts: 3924
Joined: August 17th, 2005, 9:12 pm

Re: Car Polishing 101

Postby Alpha_2nr » April 17th, 2011, 9:04 am

^^I didn't ask for an internet google search, anyone could do that. You seemed to have some experience with Toyota clear coats in person (I certainly dont')....so I was seeking your input.

Yes softer paint finishes are easier to work with but also easier to scratch etc.


And? it still goes back to my point.

If softer paint is easier to work with, then it should be easier to fix. If you've done your detail, and you STILL have swirls after your next wash, it's either:

a) You didn't do a good job at the detail first time around

b) Paint is being marred by your poor wash being done after that detail, and/or product application techique DURING that detail (e.g. MF's that were washed with other poly fabrics, leading to a "lint" on the MF that can cause micro scratching)


And if you have good wash and prod application technique, then all having a "soft paint" should mean is that you make your job easier at removing swirls.


Subsequent swirling should NEVER be an issue even if you have the world's softest or hardest paint, since a good washing technique (for example)..will BARELY inflict ANY swirls....if any at all.....on ANY FINISH.

Also, swirling DURING product application/removal (i.e. swirling by "towelling") should NOT be an issue either, since good technique/towels/products will NOT induce swirls during product application or removal.

If you're having difficulty with your car, you should desist from your current attempts, before you inflict damage to your paint, and go to a professional detailer for advice; they can also do a detail on your car to your satisfaction, and you can work from there.

User avatar
Chemical
I LUV THIS PLACE
Posts: 1048
Joined: May 17th, 2007, 3:09 pm

Re: Car Polishing 101

Postby Chemical » April 20th, 2011, 5:34 am

^^This looks pretty intresting especially as the rains are coming now...

The members of the Ask A Pro blog are constantly bouncing ideas, techniques, and product recommendations off of one another and on multiple occasions last year Greg Nichols brought up this new product called Tuf Shine. He said that it was a semi-permanent tire dressing, and was giving it glowing reviews. Yeah, yeah, another new tire dressing…been there done that. We figured he was just pitching the product because it was from his home state of Utah.

While we were attending the SEMA Show in Vegas last Fall, Greg was once again singing the praises of the product. And when we caught a ride after dinner with him one evening, he made a point to show us the tires on his Explorer. Hmmm…it actually looked pretty good I thought. Since he had us as a captive audience during the drive back to the hotel, he continued to tell us more about the product, and said that (a) we should start using it and (b) Detailed Image should start carrying it. When he dropped us off, he reached into the back of his SUV and grabbed a Tire Shine Kit out of his stash and said: “Here…give it a try”. I knew I was getting pitched, but I didn’t expect to receive anything for evaluation on the spot! I need to get Greg his own infomercial show…he’s good.

So I brought the (very nicely packaged) Tuf Shine Tire Shine Kit back to Ohio with me, and tried it out on the next car that I worked on.

What differentiates Tuf Shine from your standard tire dressing is the fact that it’s a rubber clearcoat being applied to the tire, and not a “dressing”. And after a few minutes drying time, the tire is completely dry to the touch…no black residue will come off onto your hands (or clothes). It’s a completely different type product…

The Tuf Shine Tire Shine Kit has everything you need in one package…Tire Cleaner/Prep, Tire Clearcoat, Applicator Sponge, Tire Brush, and Nitrile Gloves.

In the detailed kit instructions, it talks about the necessity to do a thorough job cleaning / prepping the tires first prior to applying the Tire Clearcoat since it won’t fully bond to the rubber if silicones and contaminants from previous tire dressings are present. The better the prep, the better the finish and more durable the application. While the first time you use the kit it may take more time since you need to deep clean the tires, any subsequent applications should be much quicker because all you will be doing is freshening up the clearcoat.

So first take a dirty tire, and spray on the Tire Cleaner / Prep. It takes a strong cleaner to remove all of the contaminants built up on the tire, so you need to be careful with its application. Don’t let it dry on any surfaces, and be very careful around uncoated wheels.

Image

After you let it sit on the tire for a minute, use the included Tire Brush and scrub the surface until it comes completely clean. It may take several applications / scrubbings to get the tires completely clean, but a little extra time invested now will help you maximize your looks and durability.

Image

Once you have finished scrubbing, and the cleaning solution is no longer brown, then you’re ready to thoroughly rinse off your tires and rims. Also be sure to rinse around any painted areas where overspray could possibly get to.

Image

After the tire is dry, put some of the Tire Clearcoat into the applicator sponge and evenly apply it to the tire surfaces. It is a runny solution (not a gel), so be careful not to use too much. A few extra wipes with the sponge should evenly disperse the Tire Clearcoat. NOTE: In the photo below, you will see a patchy look to the tire where I haven’t applied the Tire Clearcoat yet. This is what the tire looks like if you don’t thoroughly clean it in the first step (yes…that means I failed to clean it properly for my photo session…sorry).

Image

After a few minutes, the Tire Clearcoat will completely dry to the touch. If you want a higher level of gloss you can do 2 or 3 applications, allowing ample drying time between coats.

Image

The finished product is a nice, dark look without being overly glossy, and without any worries of residue slinging onto your freshly detailed car!

Image

See this also:

http://www.detailedimage.com/Ask-a-Pro/ ... shine-inc/

Advertisement

Return to “AUTOMOTIVE TECH”

Who is online

Users browsing this forum: No registered users and 7 guests