Page 1 of 1
DIY : CVT Fliter Cleaning
Posted: March 31st, 2013, 12:24 pm
by Gx7
yea folks just got me a d15b CVT hatch going to hsow you guys how to clean the filter in the tranny
tools needed
- 12 , 14, spanners / sockets
- I/2 '' Drive power handle
- Pliers
- Container to catch oil
- Carb Spray
- Rags
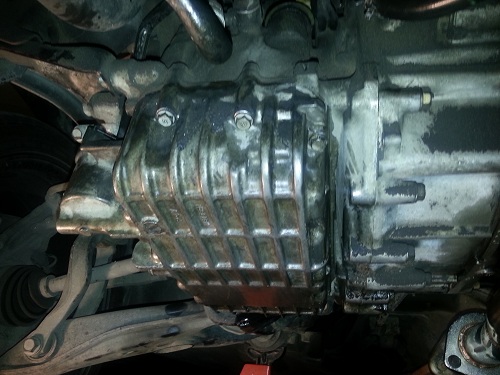
- 1.jpg (60.87 KiB) Viewed 9581 times
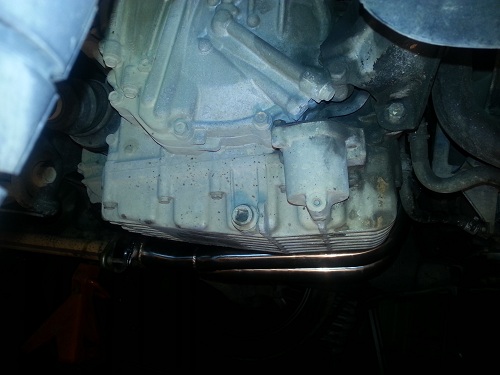
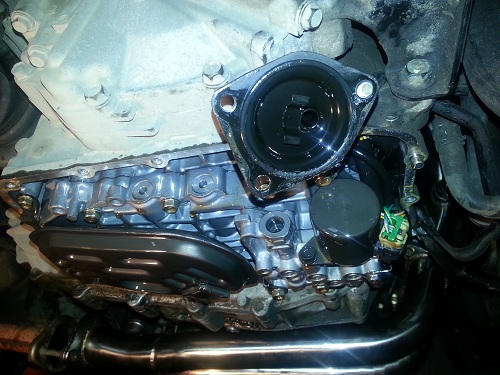
Tranny right hand side of the vehicle
1/2 '' power handle to screw out the drain bolt to drain the CVT fluid
CVT fluid draining
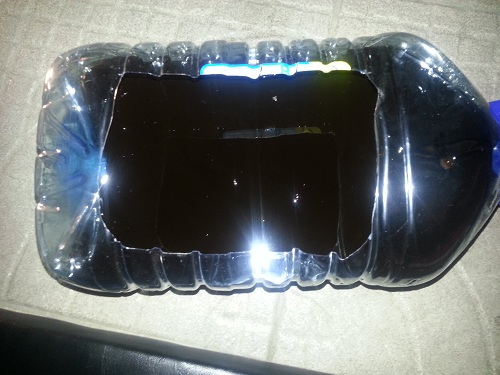
- 4.jpg (78.01 KiB) Viewed 9581 times
Dirty oil
- 5.jpg (87.4 KiB) Viewed 9581 times
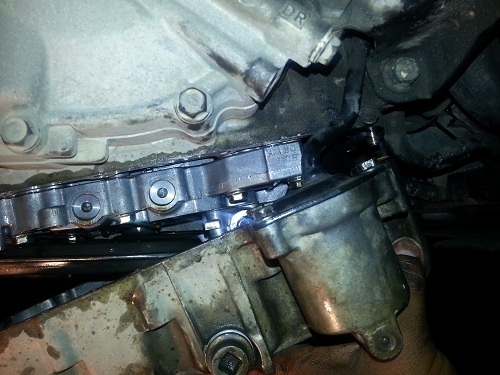
it has about 12 10 bolts around the housing of the tranny crank case remove them , and gently pry the pan down
as shown the cylindrical case is the filter housing , above it has 3 10 bolts carefully remove the bolts
- 6.jpg (89.25 KiB) Viewed 9581 times
as you remove the bolts the bottom housing will drop and you will see the filter top becareful not to burst the O ring on top of the filter
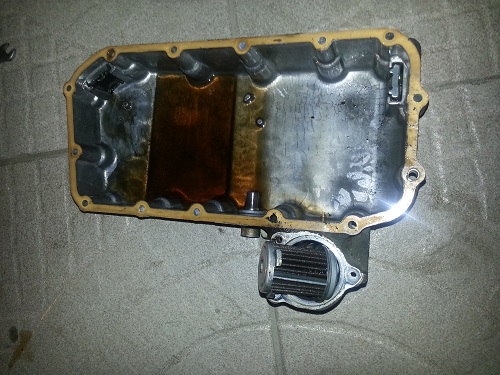
- 7.jpg (104.8 KiB) Viewed 9581 times
gently pry out the filter as shown
then take carb spray and clean the filter and housing
Re: CVT Fliter Cleaning DIY
Posted: March 31st, 2013, 12:30 pm
by Gx7
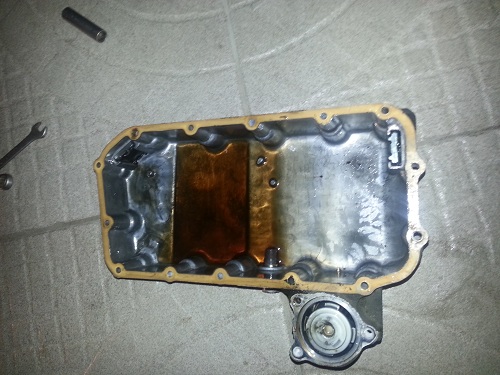
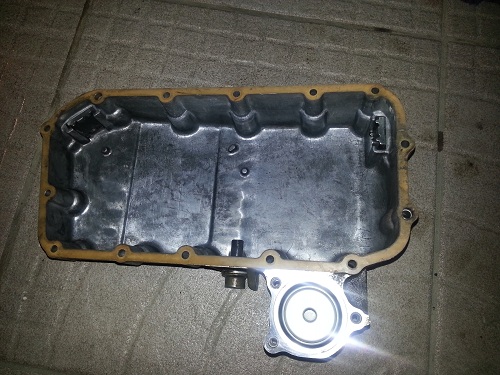
- 8.jpg (96.95 KiB) Viewed 9578 times
what the bottom of the tranny looks like
- 9.jpg (98.59 KiB) Viewed 9578 times
clean filter and housing
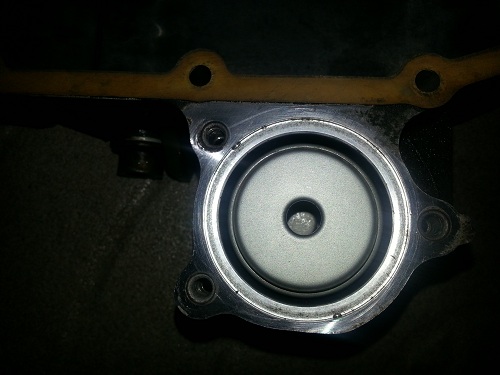
- 10.jpg (57.94 KiB) Viewed 9578 times
- 12.jpg (98.8 KiB) Viewed 9578 times
replace bottom housing , be careful with the housing 10 bolts not to put to muc torque on them to pop it .
refill the tranny with 5 qrts to full
run the car for about 15 mins drive then return , drain the oil and replace it with new fluid and your tranny should work like new .....
Re: CVT Fliter Cleaning DIY
Posted: March 31st, 2013, 1:18 pm
by CD4Accord
The only improvement I can recommend is using a torque wrench if you have one when re-assembling just to make sure you don't overtorque those bolts.. You can get the bolt specs online I think
I had a volvo once where the previous owner overtorqued all 19 tranny bolts, and at least half of them actually completely ripped out the treading from the trans body in the process.. It wasn't pretty
Re: CVT Fliter Cleaning DIY
Posted: March 31st, 2013, 3:44 pm
by Gx7
yea i should of torqued the bolts .... mayb later if i get some time i wil
Re: DIY : CVT Fliter Cleaning
Posted: March 31st, 2013, 8:56 pm
by enigma
A couple things: did you replace or reuse the gasket between the oil pan and the tranny?
your initial refill is with the drained fluid and then new fluid after the drive, or new fluid then new fluid?
and i think the drain bolt is a 3/8, not 1/2.
Re: DIY : CVT Fliter Cleaning
Posted: March 31st, 2013, 9:13 pm
by Gx7
Reused the gasket as stated i said gently pry down so the gasket so it would not burst ... to get a oem gasket to replace it would be very hard , but u can always buy gasket paper and make 1
drain the fluid --> replace it with new fluid ---> run the car for about 20 mins ---> replace again with new fluid
about 10 qrts will do the job which should cost about $880
Re: DIY : CVT Fliter Cleaning
Posted: March 31st, 2013, 9:23 pm
by enigma
The filter, o rings and gasket can be gotten quite easily actually. Thanks for the info anywa. Good thread.
Re: DIY : CVT Fliter Cleaning
Posted: March 31st, 2013, 9:33 pm
by Rooki3
well done
Re: CVT Fliter Cleaning DIY
Posted: April 1st, 2013, 9:57 am
by Vtec Vigilante
sti7 wrote:yea i should of torqued the bolts .... mayb later if i get some time i wil
Superb DIY bro. btw how much to torque them bolts ?
Re: CVT Fliter Cleaning DIY
Posted: April 1st, 2013, 7:53 pm
by Gx7
Vtec Vigilante wrote:sti7 wrote:yea i should of torqued the bolts .... mayb later if i get some time i wil
Superb DIY bro. btw how much to torque them bolts ?
idk will have to ask around or call classic
Re: DIY : CVT Fliter Cleaning
Posted: April 2nd, 2013, 9:21 am
by ruffnek
very good info.... asked alot of people on how to perform this and no respond
thanks alot,.
Re: DIY : CVT Fliter Cleaning
Posted: April 2nd, 2013, 8:47 pm
by Gx7
^^^^ PM me your # i was d pdf
Re: DIY : CVT Fliter Cleaning
Posted: April 2nd, 2013, 8:50 pm
by ruffnek
786-2759
issa book not pdf
Re: DIY : CVT Fliter Cleaning
Posted: April 5th, 2013, 10:53 pm
by HondaR
Very good post.Mine actually need cleaning and searched far and wide on how it was done and finally found a post on how it is actually done wid pics and all.Thank you very much.
Re: DIY : CVT Fliter Cleaning
Posted: April 18th, 2013, 4:11 pm
by HondaR
To Sti7,does your tranny really take 5qts,cause mine takes around 4 1/2 or a little less.
Re: DIY : CVT Fliter Cleaning
Posted: April 18th, 2013, 6:06 pm
by khandman
Well done. Just bought a ek hatch with a d15 cvt. will definitely be doing this as part of my mte.
Re: DIY : CVT Fliter Cleaning
Posted: April 18th, 2013, 6:49 pm
by Gx7
HondaR wrote:To Sti7,does your tranny really take 5qts,cause mine takes around 4 1/2 or a little less.
mine took about 4 and a lil thing cuz d torque converter was full
Re: DIY : CVT Fliter Cleaning
Posted: April 18th, 2013, 10:44 pm
by HondaR
Ok buddy
Re: DIY : CVT Fliter Cleaning
Posted: March 12th, 2014, 11:34 pm
by HondaR
Just changed this filter along with the two seals and gasket this week,and car drives times better than before.For those who need part numbers for these items it's as follows:-
PACKING, OIL PAN (Oil Pan Gasket) 21814-P4V-000
FILTER COMP - 25450-P4V-013
O-RING, 37.7X3.5 (ARAI) - 91305-PN4-003
O-RING, 49.3X2.4 - 91331-P4V-003
All these part numbers taken from japanese catalogue on cd.Once u learn how to operate this catalogue,you can find exact part number for each and every part.Been using it the last couple of years and each part correct each and every time.
Re: DIY : CVT Fliter Cleaning
Posted: March 13th, 2014, 8:39 am
by enigma
So you have the catalogue? Wanna share.
Re: DIY : CVT Fliter Cleaning
Posted: March 13th, 2014, 5:10 pm
by HondaR
http://hondatech.info/downloads/Auto/EPC/Download the honda jdm epc.zip
its an iso in that zip file.It has to be burned to a cd as a iso file.Below is a link to how to get it to run.Scroll down to the bottom of the page.
http://www.cityturbo.com/forums/viewtopic.php?t=2871Ill post more clearer instructions on how i run mine using chassis,engine number etc later.Works on Windows 7 as well.
Re: DIY : CVT Fliter Cleaning
Posted: March 13th, 2014, 11:26 pm
by HondaR
Ok once you've burned the file as an iso image onto the cd and you've gotten the program running by clicking HMEPC.EXE in the c:\epc directory where it is installed you'll be greeted by the program with 5 options at the top menu bar.Click the third one from the left,selecting the only available option and then clicking the middle option from the three presented.After this you'll be presented with a whole list of different hondas,select the civic 3d option.
Then select E-EK3 and you'll be presented with 5 boxes to fill in your info.The first one is your chassis number,the second one is your engine number and the third one is your transmission number.After filling in these three press ok and you'll be presented with a long list of different trims,ri,vti ,auto/manual etc.
For us with the cvt 3 dr hatch ,I have the ri body trim so I'll choose 3 AT RI .
After this you'll be directed to a selection of 5 options on your left.By default the first one will be chosen and the first one on your right will be selected.You can browse through these different 7 options depending on what you're looking for.
For example by selecting the first one I'll be directed to 9 boxes with different diagrams.To go to next page in this group select the fourth option from the bottom of the menu from your left.To choose if you want one of these press the number and it will be highlighted and then press ok where you'll be directed to an enlarged view of the diagram.To zoom in right click the mouse over the diagram.To see a specific part number enter the number corresponding to the part in the first small box on the right and just put 1 in the second box as the amt you want and you'll be shown the part number below.
To go back to main menu,click the second option from your left at the bottom of the page and you'll be directed to main page where you select the third option at the top of the menu and then the second option and you'll be directed to the diagrams again.
To make it easier to see exactly what part you're looking at,I also suggest using the honda euro epc as a guide,it makes life easier.Also Lings.com is a big help.If you arent sure abt the specific part you have pulled up enter it in lings part search feature and you'll be presented with a description of the specific part or use the euro epc to make sure its the exact part you're looking for.
I know this is a whole lot to take in lol,so I've tried to describe each step as much as I could.
Feel free to ask me any questions you have.Hope I've been of assistance.
Re: DIY : CVT Fliter Cleaning
Posted: May 11th, 2014, 11:11 pm
by tusman96
Bump
Re: DIY : CVT Fliter Cleaning
Posted: May 12th, 2014, 12:06 am
by nareshseep
I will suggest thread locker in addition to the torque wrench for the paranoid DIYer,
comes in handy especially for aluminum bolts on aluminum housing
Re: DIY : CVT Fliter Cleaning
Posted: May 12th, 2014, 3:41 pm
by CD4Accord
Agreed on the threadlocker... Some nice permatex or loctite could save you a lot of headache later on down the road
Re: DIY : CVT Fliter Cleaning
Posted: July 8th, 2014, 9:24 pm
by 1UZFE
one of the best things u can do to a honda
Re: DIY : CVT Fliter Cleaning
Posted: July 23rd, 2015, 8:59 am
by ryan3252
Bumb